1
0
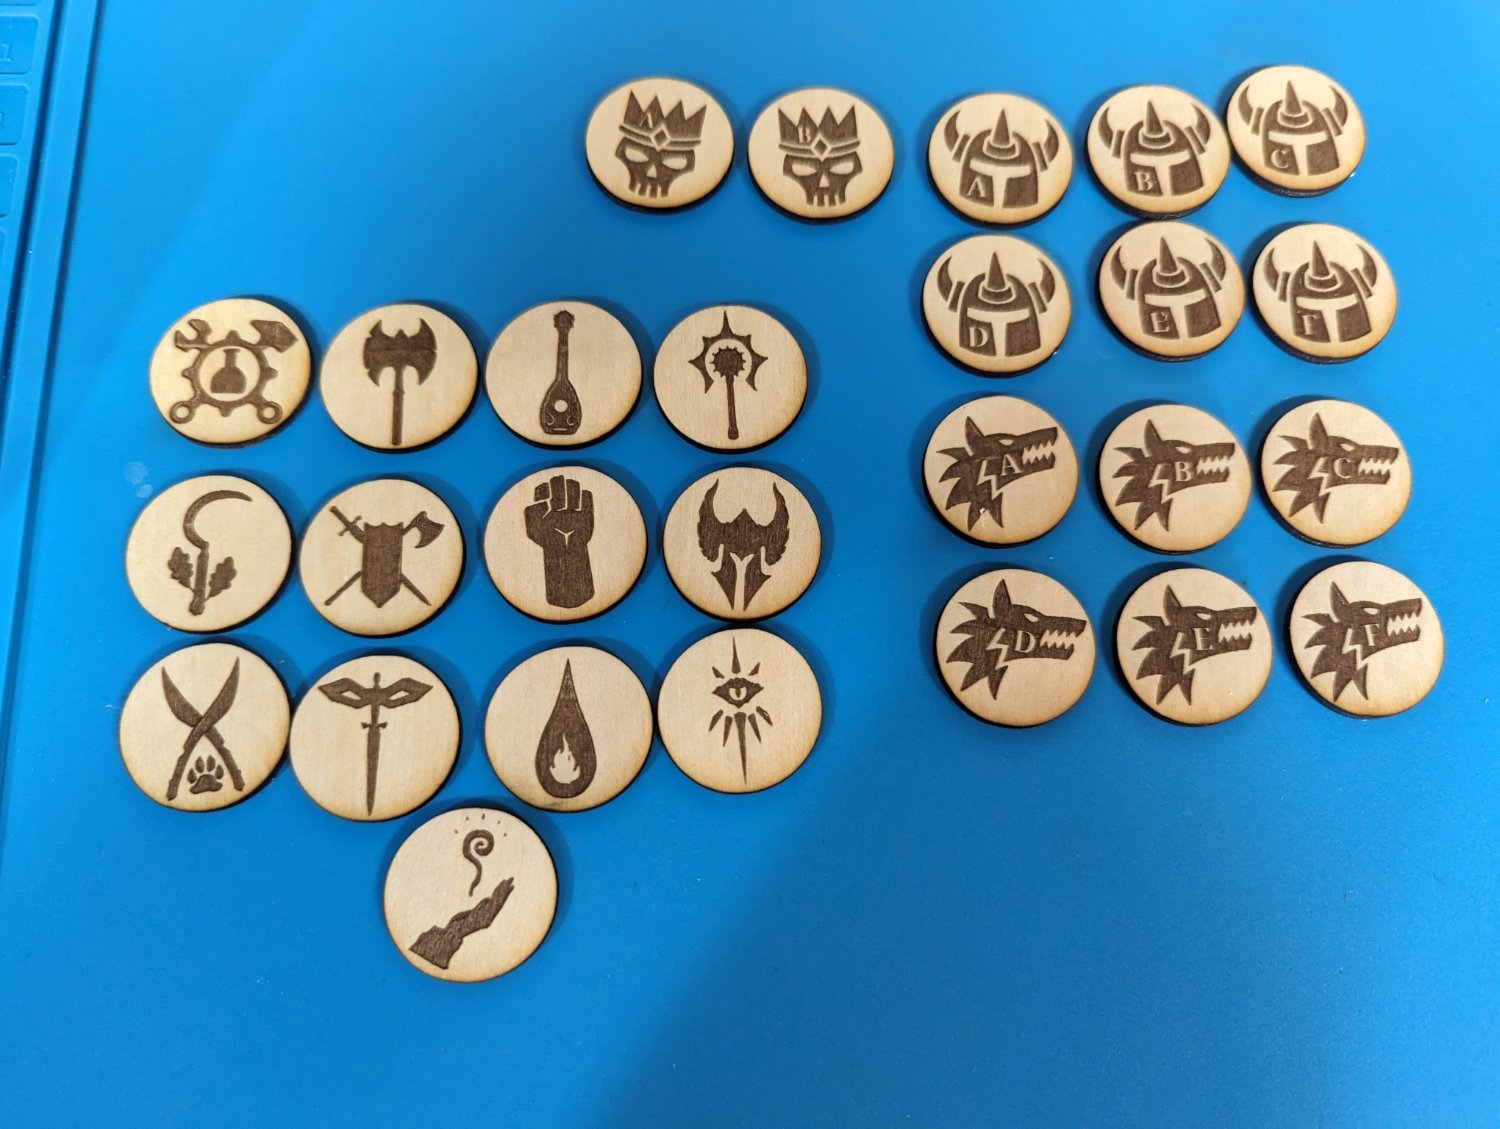
I'm just starting to DM and I liked this idea of a set of generic tokens that can represent any monsters you don't have minis for. I also made one for each character class. For a campaign I'll probably use my resin printer, but tokens like this will be great for one shots or whenever I don't have tons of time to prep.
I'm super happy with how these turned out.
Original article here: https://slyflourish.com/crafting_lazy_monster_tokens.html

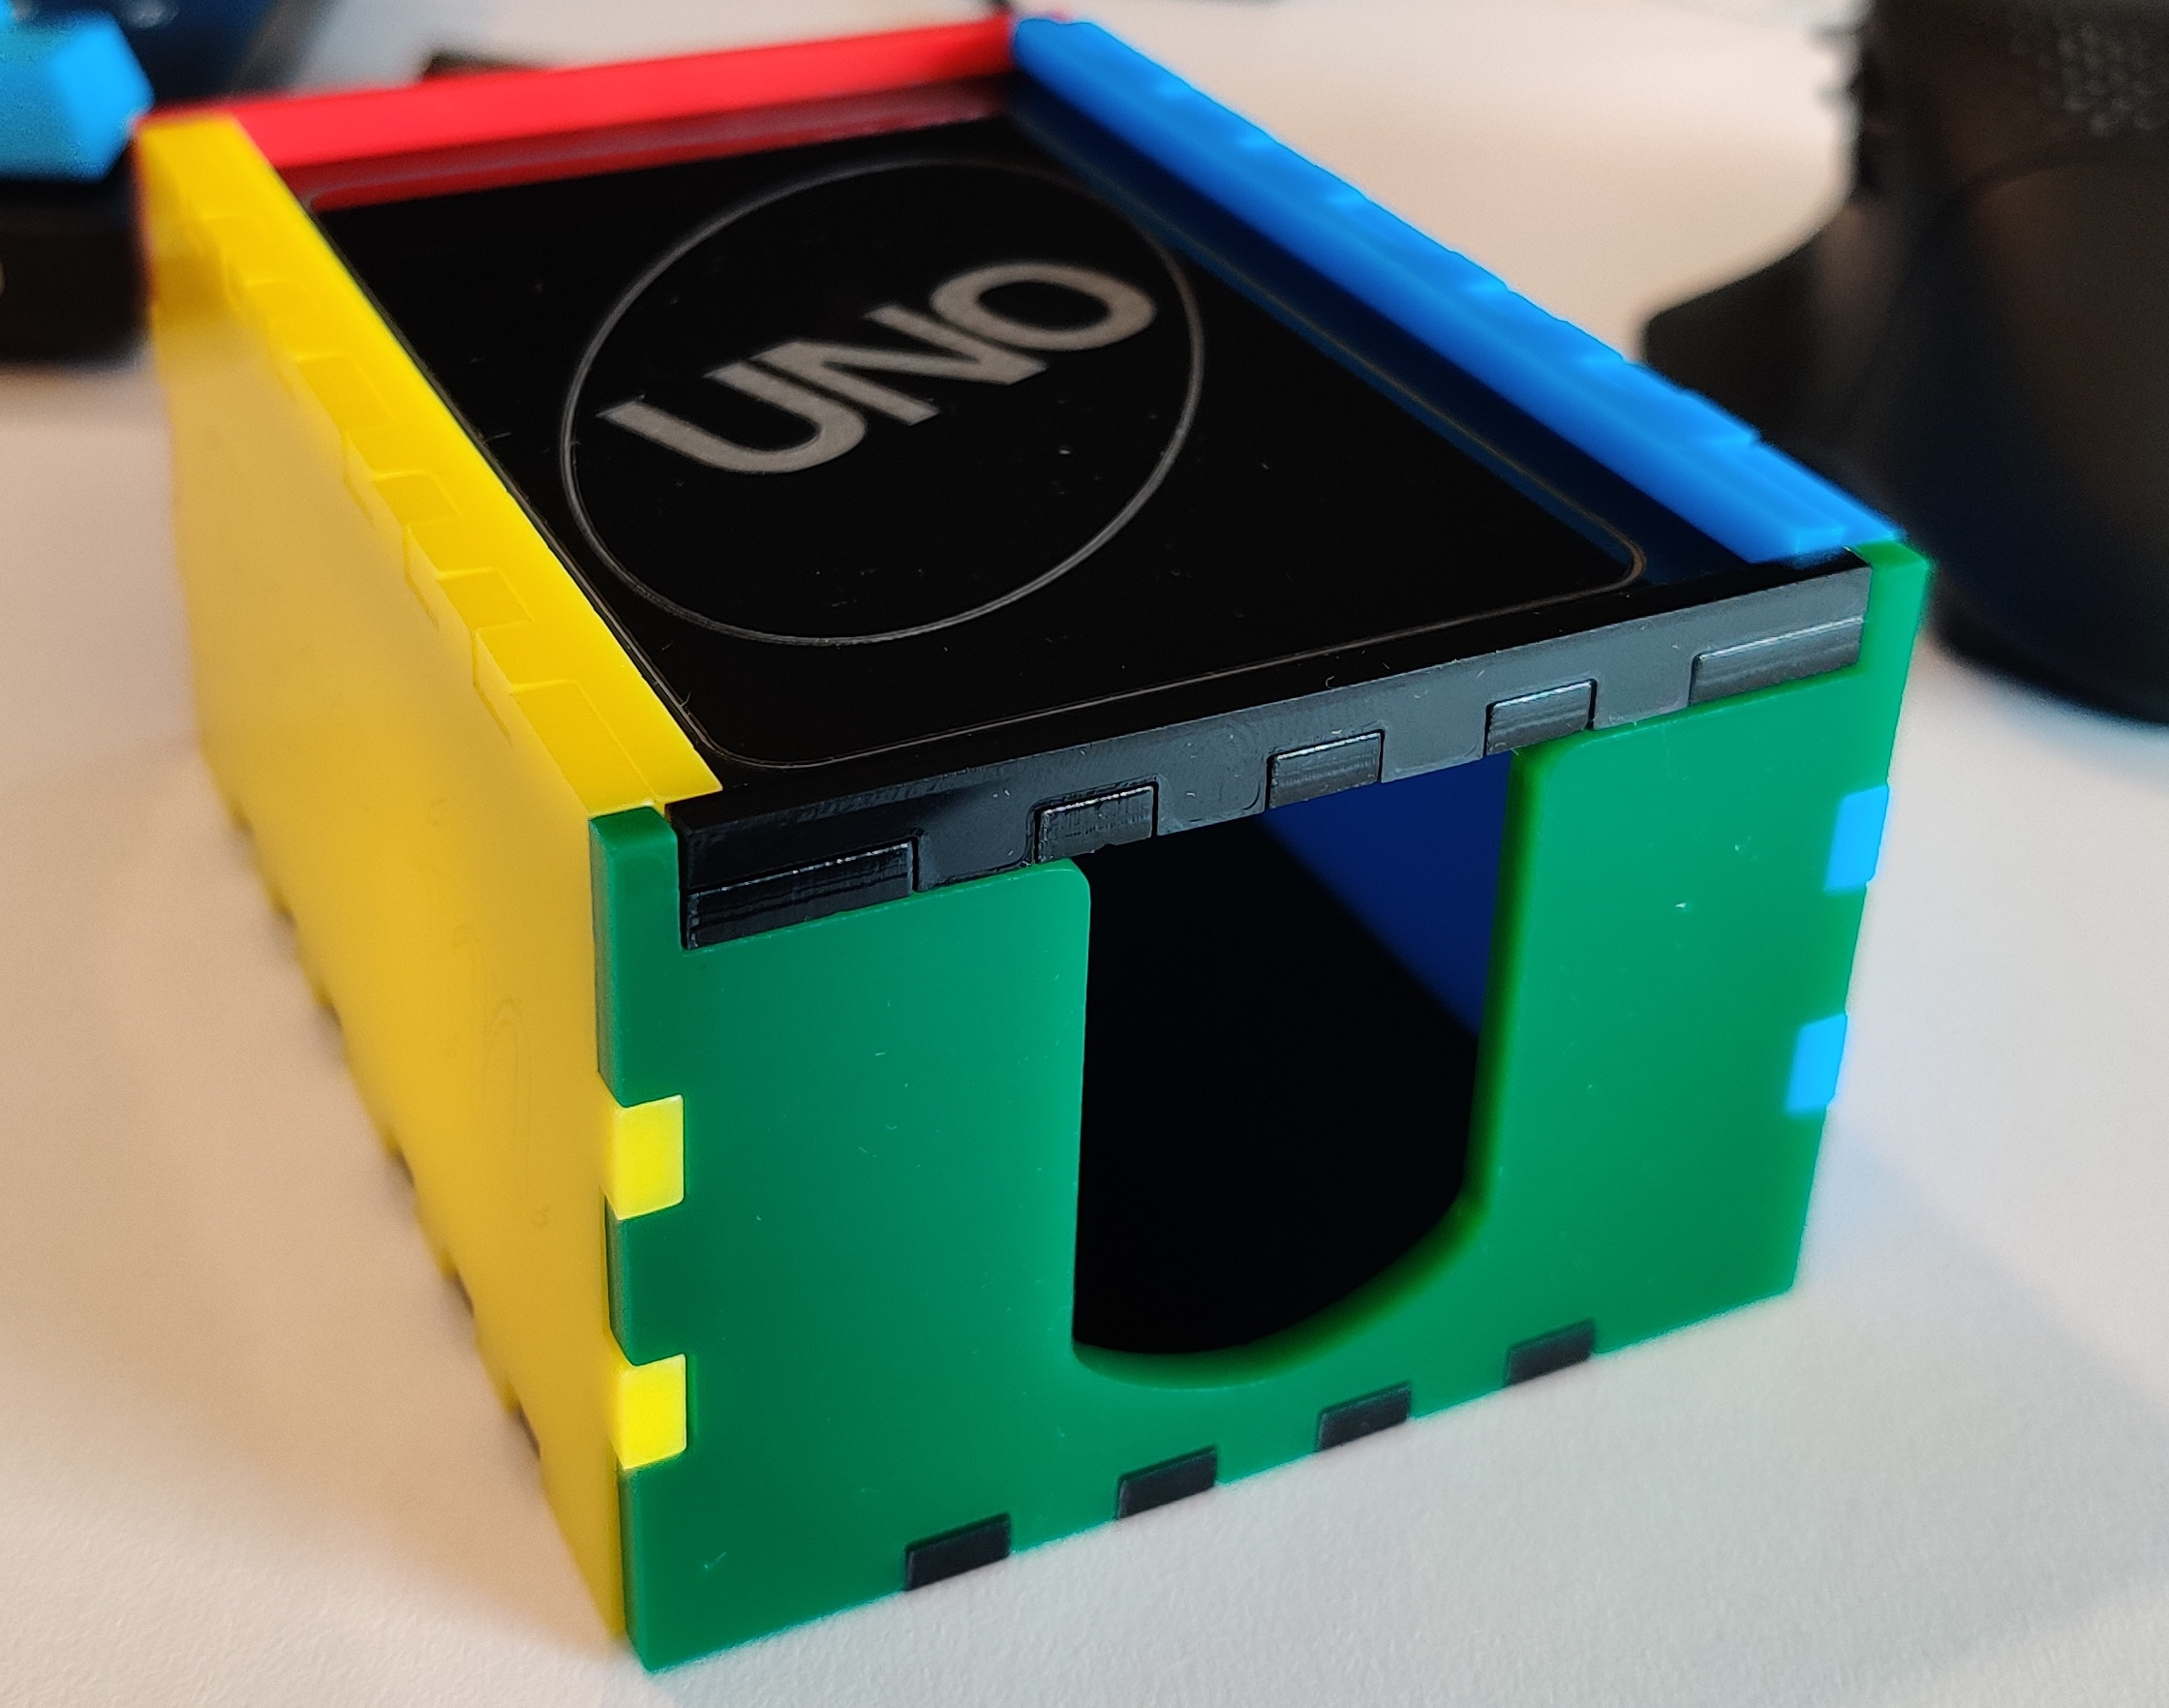
This is 3mm cast acrylic.
The design started with CardBox from Boxes.py
I made a few modifications, such as improving the lid design and adding holes to make it easier to access cards.
A friend of mine asked if I could make something for his sister who operates a local cat foster program. These follow the same design I used when I made these for my own sisters (previous post) only I did not make a frame for this one.
Here you can see the four layers of 3mm plywood I cut out on my laser cutter

Sanded and stacked together

Stained and glued together

Spray polyurethane added


I had a gap in the wall from where an old monitor mount used to be attached so wanted to make something to cover it up.
The LEDs are controlled by an ESP8622 running WLED, monitor data from the PC comes from Hyperion software. It can be set to a constant color, dozens of set themes, or match the color output of whatever is on my monitor.


The microcontroller sits under the desk and receives constant power, it is the wired to a button on my desk to turn on/off power to the LEDs.


Laser cutter action:

I tried to give it an aged rock/stone appearance using some textured spray paint which actually turned out pretty well. I think some of that doesn't come across well in the photos, but in person it looks good (to me anyway).
LEDs changing color https://imgur.com/a/8CmepDk
How to get WLED running: https://tynick.com/blog/11-03-2019/getting-started-with-wled-on-esp8266/
More info about Hyperion https://docs.hyperion-project.org/en/user/leddevices/

Had some left over red acrylic so made a simple support for my GPU

I have a family member that is big into Weber charcoal grills, and each year he and all the other grilling enthusiasts from around the country get together for their annual meet up.
To commerate his last meet up I made him a set of slate coasters featuring Topper, the original logo for Weber grills.
Blank slate coasters purchased off Amazon. I think they come out to about $1 per coaster. The process is pretty simple. I put masking tape down on the bed of the laser then lightly etch a a few circles so that I can quickly center the blank coasters in my machine for batch etching.
You will notice some are darker than others, that is because I spray a light coat of poly which makes the etching pop. The darker ones already have been sprayed.


I also made a caddy to hold the coasters


This was my first real dive into Arduino and multiple button mapping. It took a significant amount of trouble shooting and learning the software to get things to map to the computer action.
Gif of the action https://imgur.com/a/XI9KTeH


Prototype 1:Started this project before I had a laser cutter and had tried to just drill through acrylic. It didn't work well, but it held my buttons during testing

Prototype 2
Still no laser cutter but I cut out using plywood worked much better for manually cutting out the holes

Prototype 3
Much better


I had bought a big box of bulk Pokemon cards off of eBay and had been giving the kids a few each time they did their chores or as positive reinforcement when the did something good.
I wanted to find a way to make it more fun so came up with this prize wheel. Instead of just giving them two cards from the pile they get to spin the wheel and the corresponding prize. Usually just let's them look at a few cards and pick the one they want vs random getting one.
There were some "rare" cards too which they had a chance to win.


I am not really convinced our house plants need labeling, but my wife asked for these so I made them! Since COVID she has gotten really into house plants, and every room is packed now with greenery which is great!
These are super easy to make and only take a minute to cut out. I have also used acrylic to make outdoor vegetable garden identifiers.

For people wondering what you get when you order a $350 laser cutter off eBay. I purchased this 2 years ago and have had no issues. All of my project posts are using this machine, although I have upgraded/modded the machine since purchase
Here was the original posting, doesn't look like this sellar is around anymore

Shipped from a warehouse in California so I didn't have to do any import stuff


Double boxed with unformed styrofoam

Inside stuffed with the "accessories" which were mostly tossed in the garbage, and some loose foam.

Cutting bed and fume extractor both of which I would later remove as part of the modifications

They had the water cooling tubes routing out through the exhaust fan for shipping, easy process of rerouting them during the initial setup

Lots of info online about ensuring proper grounding with these. I followed the guides around sanding off the paint to ensure good contact with the metal from the case. I think this is probably the only https://i.imgur.com/psS1TY8.jpeg I did before the first cut


This splice on the high voltage line seemed pretty ghetto to me, but the internet "experts" on the K40 forums assured me this was fine/normal.

Stock fume extractor fan and water cooling tubes. I added a water movement indicator and removed the fan and added a inline exhaust as part of later mods.

Mirrors were hot glued in place, but actually alignment was perfect right out of the box for me and this thing cut without issue on the first try. Over the years of mods and banging it around I have removed the glue and fine tuned but the tube and mirrors have held up well.

Here it is today in all it's glory. I will do other posts on the upgrades later down the road.


I had an open wall and a sheet of cheap 3/4inch plywood sitting around so I made a French cleat wall.

If you are not familiar with the system, the slats on the wall have the top edge cut at a 45 degree angle and the shelving/storage items have an opposite angle so they slide right into the grooves.

More pics of my messy shop


Made from 10 layers of 3mm Baltic Birch plywood. This was a gift for my mother who has two pugs.
All the layers made this a pretty tedious process, with lots of failed cuts that needed to be redone multiple times. The small bed size of my K40 didn't help
There are small holes on each layer that I fed fishing line through to help with alignment while gluing it all together.


The microcontroller that runs the weather station is an ESP8266 and a 2.4 inch touch screen. The button turns on and off the LED backlight on the screen.
Inside the base is a charging station that powers the weather display, 2x USB C and the galaxy 4 watch base.
The base is made of layers of plywood cut out on my laser cutter.
Weather station code by Daniel Eichhorn https://github.com/ThingPulse/esp8266-weather-station-color


Weather info is grabbed from Openweathermap, you can sign up for their free API key
Source code https://github.com/ThingPulse/esp8266-weather-station-color/blob/master/esp8266-weather-station-color.ino
I was using adafruit hardware so used their guide/libraries https://learn.adafruit.com/wifi-weather-station-with-tft-display
I had to remove some of their touchscreen calibration code since it seemed to be causing things to get hung up in a loop when turned on.
I also had to adjust the rotation 180degrees so the ESP attached to the back of the screen was at the bottom instead of the top to fit it in the enclosure.
I use pin 5 to toggle the LED backlight.


Cut on my K40
cross-posted from: https://lemm.ee/post/586133

Some random build pictures. I didn't do a great job documenting this build.
I have made a few of these as gifts for cat lovers in the family. The cats are made of three layers of 3mm birch plywood cut out on my laser cutter.


A few other versions I have made


Share, discuss, troubleshoot, try not to blind yourself.