119
Here is what it looked like when I got it home:


Fully stripped back:
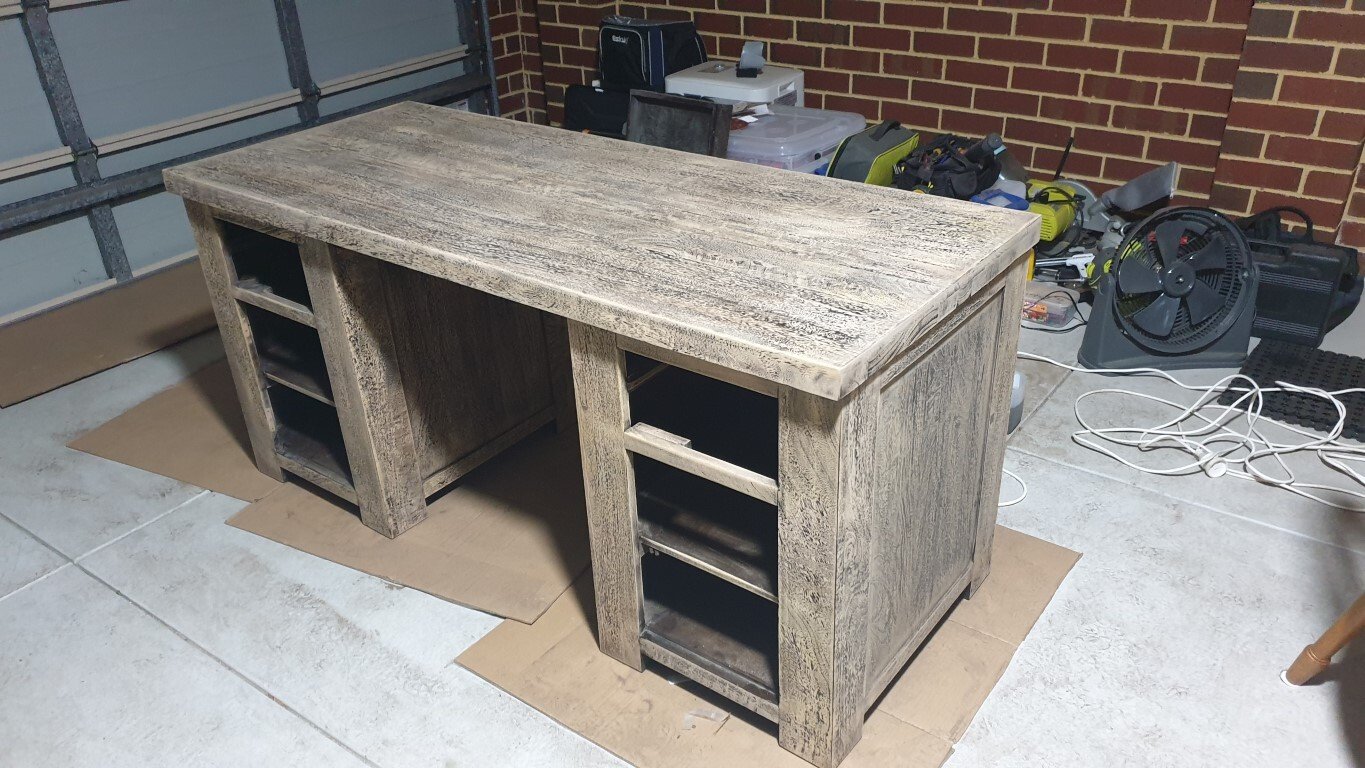
And restored to it's former glory:


Here is what it looked like when I got it home:
Fully stripped back:
And restored to it's former glory:
So, "op shop"... are you Australian?
Also, what wood is that? Something local to Australia? And is that top really solid 8/4??!?!?!?!? If so, I mourn your lower-back's sacrifice in the service of well-done furniture refinishing.
Yes, Australian. Op shops are Australia's thrift stores.
Yes the thing was solid grain timber throughout. Even the drawer bases. Thats why when I saw it I knew I had to save it. Thing weighed a ton. I needed to rig up a crane system with ratchet straps to safely get it out of my camper van by myself.
I dont know what kind of wood it was though. Something fairly soft and heavily pitted though.
Australian lumber is a whole different world. Maybe some sort of blackwood or a eucalyptus? That figuring doesn't look like any pines or cypresses I know of.
Regardless, it looks like whoever made that was not fucking around. That thing looks to be built like a brick shithouse. They even alternated the growth rings on the top, though I understand that only helps a little and can result in "rippling" when a consistent cup might have been controlled equally well; still, it's a classic technique. You may want to wax those slides if the drawers bind at all, and if the pulls don't look original, I might find something else, but that's just an opinion.
Meanwhile, I'm over here trying to decide how much desk I can build with a single sheet of plywood and a 2x8, and whether it would look any better than my 15 year old Ikea trestle table that was cheap when I bought it.
Full sheet or handi-panel? With a full sheet I'd rip it to 30" (my preferred desk depth), use the remaining 18" to make 2 30"x~29" (conveniently also around my preferred desk height) panels for legs on the side. 2x8 as a stretcher in the back (I'd rip it in three, one 2x2.5 at top back right under the desk top to reduce sag, one on bottom as stretcher, one cut to height it desk in back middle as leg, or even two spaced evenly).
Something like that I think would be pretty solid and plenty of desk. I can draw pics or think more on it if you want more suggestions. (Fellow amateur woodworker with several engineer friends)
My thought was a full sheet. This math would drop a little due to actual dimensions and kerf, but I'm roughly thinking 30"x60" for the desktop. Then you've got an 18"x60" piece to make a modesty panel/back. That leaves 3'x4' from which I could cut two open boxes, roughly 12"x12"x18" that could be joined to the modesty panel to make open cabinets.
That leaves the 2x8 to cut glorified edge-banding and a couple of leg assemblies that only need to be 15"18" tall. There should be enough offcuts left to make some crude cable management and additional reinforcement.

Sounds like your plan would work and isn't too dissimilar. My only thought with using the 2x8s for legs is to make sure there's proper bracing so no potential for torsion or racking.
(I cheat and use shelving brackets, like $2 a pop on sale often)
Yeah, the idea would be something like THIS, with similar widths for the leg assemblies, though they'd be taller and I'd lift the front-to-back stretchers to give me four feet with a similar look, versus trying to get it perfectly flat. I think by giving the legs a bit of "chonk," they can be mounted securely enough to prevent racking, and there'd always be the possibility of a stretcher to connect the two assemblies, though I'd feel like I lost the game of BoM management if I had to buy a second board!
The other idea I liked would be something more like THIS, where the legs' assemblies are so thoroughly mated to the carcase that they really can't rack.
For joinery, probably something simple, some shallow rabbets for alignment, followed by a "glue and screw and through" method I've used before, where after the glue dries, you (one at a time) back out the screws and drill them out for glued 3/8" through-dowels. Not a subtle look, but intentional and nicer than the screws.
Beautiful!
Really well done. It looks very nice!
For DIY - this is also a placeholder.