anthromusicnote

joined 1 year ago
MODERATOR OF
 

This is a great video tutorial for stereo imaging bass-heavy instruments that you want to stay consistent on the low end, such as a bass guitar or distorted bass synth. Using stereo imaging plugins might be problematic and not produce the same results, so check the video out if this is something new to you!

If video is not your style, here's a short summary of "the trick":

The problem with using most stereo enhancing plugins is that they don't actually create side content, they just push your mid content to the side and create a really jarring wobble effect that you can hear most clearly on the low end, and your mids might not sound quite as wide as a result.

Reverbs smooth out the sound that passes through them, and with that they create unique frequencies that can be used for your stereo mix. This process fills the gaps in your frequency range and makes them distinct from your mono content, creating a wide stereo image and preserving clarity. Since we don't want to wash out the original sound we keep that reverb very short.

First, route your instrument's signal to a channel you'll use for the reverb. Then, high pass reverb channel around 160 hz so that you don't feed your bass into it. Add a convolution reverb plugin to that chain. Remove the dry signal from reverb channel so that you can have proper control over the mix. Set an extremely short decay (~0.2-0.05 seconds) on the reverb, use a small room IR or preset. Then you just max out witdh/stereo separation so all of that sound gets sent to the side channels.

If you did everything correctly, you now have your dry instrument channel and your reverb channel both sending signal to a bus or the master. Congrats!

I've personally found that convolution reverbs are not necessary to achieve the same effect, but a unique room signature will certainly give the sound more flavor.

Hope this little trick helps you on your journey!


I present to you VSCO Community Edition, one of the most high quality orchestral libraries that are available out there for free! They've got wind, strings, percussion and brass with articulations to boot! If you want to practice making some big orchestral pieces or to spice up your regular production without throwing out cash on a huge library you may not use, this. is. the. thing!

For a quick overview of what this library can do, let me go over some of the cool features here. They got samples with different articulations for different instruments, all of your staccatos, mutes, attacks, tremolos, vibratos, soft, hard or medium, where applicable. All of it comes packaged in a ton of different variants, .sfz for orchestral samplers (like free sforzando and sfiz), free Ochestools VST3, two different Kontakt libraries, .XRNI for Renoise, and original .wav files if you want to work it into your specific sampler! As a bonus there's a bunch of Omnisphere patches by Man Makes Noise that features movie-trailer and hybrid sounds made from this library!

But if you're trying to pick something for your first time, I suggest going with the .sfz paired with sforzando (Windows and MacOs) or sfiz (Linux). Sfz is a non-proprietary preset format that maps your .wav library to an orchestral sampler. It allows for Key Switch which is a feature for instruments with complex articulation that lets you play different articulations straight from piano roll, no tinkering required! All presets with key-switches built-in are marked with letters "KS", and if you wish to go deeper with it, you can make your own too!

A video-tutorial from Versilian Studios themselves will show you how to set up your .sfz instruments and explain some details related to the format: https://www.youtube.com/watch?v=VomafctByTs

Orchestools is more fit for advanced users that are willing to work with midi mapping, velocity mapping, envelope and LFO modulation to perfect the sound. Mind that you'll have to map every articulation separately so you can use them, as I'm not really aware if there is a Key Switch feature built-in. Also I haven't figured out a good way to work with percussion in it, so it might just not be fit for that use.

All samples are provided with Creative Commons 0 license, which means you can use it for anything you want, commercial production included!


This is a great and (relatively) concise video explaining what saturation means, different types of saturation and their relation to harmonics. Some really big insights there that will clear the process up for you. Big recommend.


I've been using Bertrom Denoiser for a while now in all of my vocal chains to clean up the recording from an occasional noise and background hiss. It basically works as a multiband noise gate, which allows it to have almost no latency and accurately target random sounds you might get in a home production setting. Set a treshold, set the frequency range, get cleaner sound. Simple. You can manipulate the strength of the noise gate at every frequency and preserve clean areas without hiss or random noise. The plugin's use isn't limited to vocals either, it can work well with any instrument recording.

They've got two versions of this plugin: Classic (Free) and Pro (25$ at the time of writing)

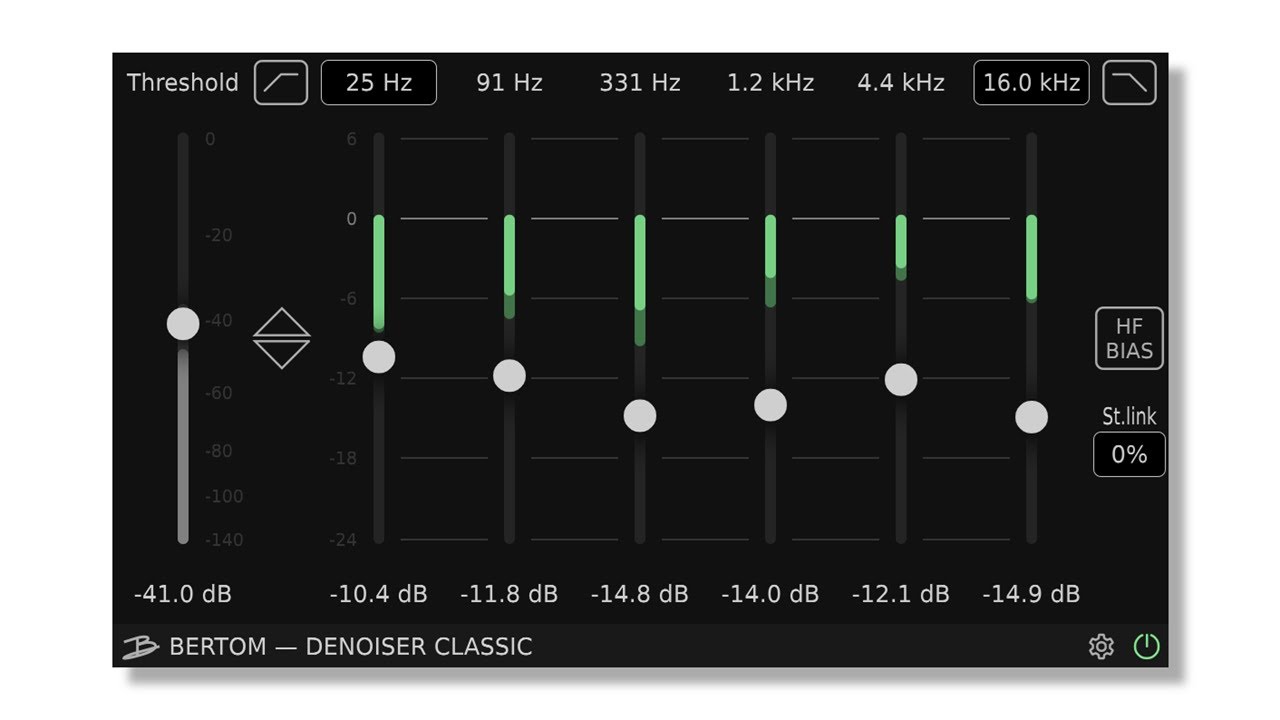
The main difference between them is that you can only set one gating treshold for all frequencies in classic, whereas Pro allows to tweak a treshold for each frequency. I've found that using two classics for low-to-mid and mid-to-high frequencies is sufficient for a difficult recording, but most of the time one is all you need. That said, I bet you can really do some good clean up with Pro.

Comes with versions for Windows, MacOS and Linux as VST3, AU or AAX, as well as for arm64 and apple silicon processors.

Bertrom Denoiser Classic (Free): https://www.bertomaudio.com/denoiser-classic.html Bertrom Denoiser Pro (25$): https://www.bertomaudio.com/denoiser-pro.html

view more: ‹ prev next ›