[-] JacobCoffinWrites@slrpnk.net 6 points 6 days ago

Or paint it red so it can go faster. With enough boyz inside all believing as hard as they can, that thing should be zipping around the galaxy. Don't have to be sneaky if you're fast.

[-] JacobCoffinWrites@slrpnk.net 37 points 1 week ago

This isn't the original, but I took the photo and cleaned it up a bit:

33
submitted 2 weeks ago* (last edited 2 weeks ago) by JacobCoffinWrites@slrpnk.net to c/utilitycycling@slrpnk.net

I previously posted looking for advice on turning my old steel-framed mountain bike into something I could use to haul groceries and maybe some bits of furniture I find on trash day.

I got a ton of helpful suggestions, and started out on what I think will be a gradual project as I make incremental improvements to this bicycle.

Step 1 was adding a rear rack, so I could add cargo panniers, or a basket behind the seat.

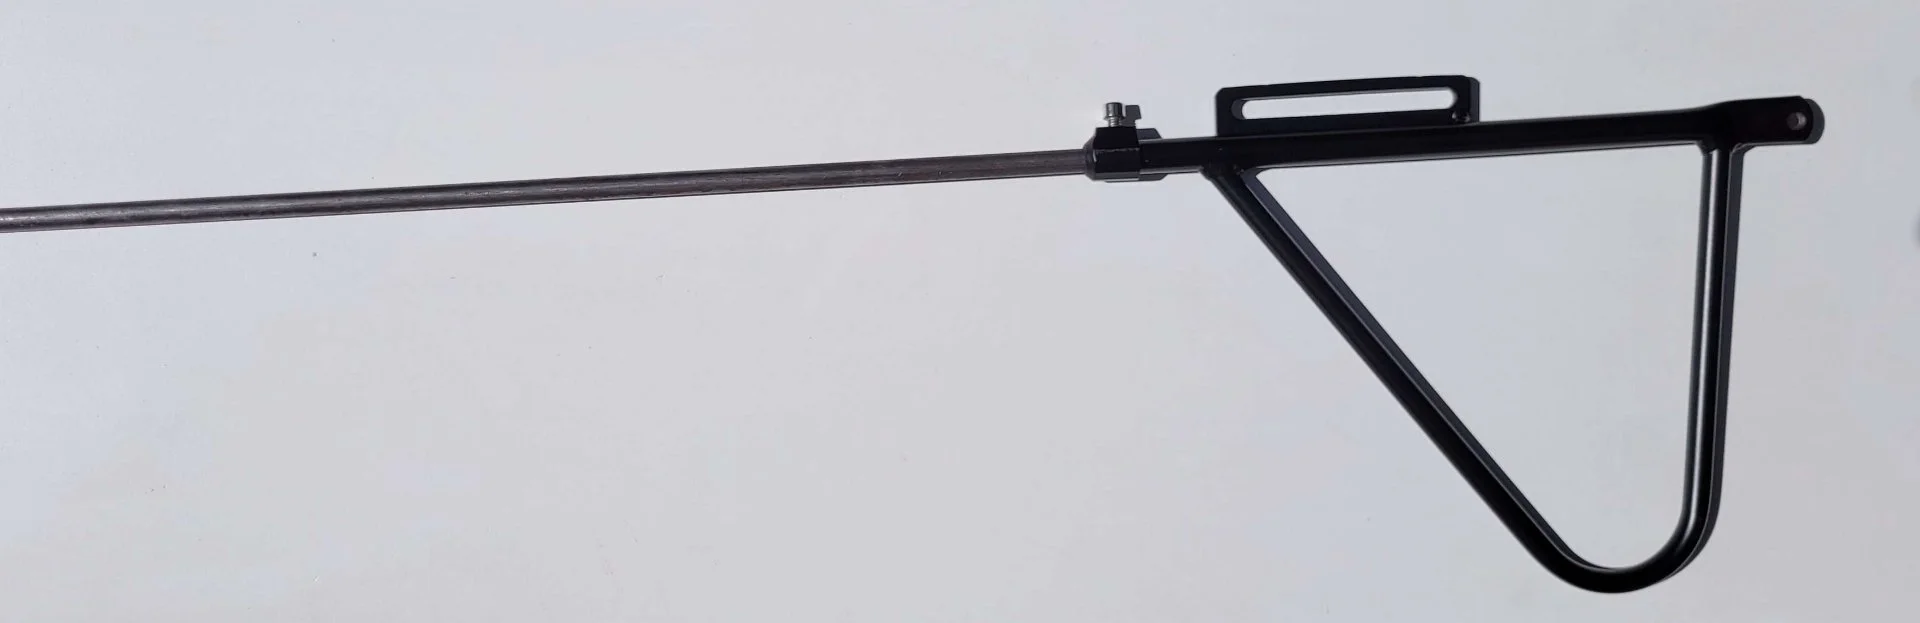
I settled on this one because I liked the extra support legs, and because it claimed to be able to support more weight than most other designs (something I remain skeptical about, but I'm pleased with the overall construction so far).

I did find that the right side seat stay was too crowded for two of the wraparound attachments to fit, so I'd need to use the built-in attachment point just above the rear gear.

Unfortunately, the lower support rod segment was too short to reach the attachment bolt. But that was fixable - the rod was just a length of 3/8 steel round stock with a flattened section where it bolted to the wraparound attachment bracket. It would be pretty easy to make one of my own.

I started by buying some 3/8” steel rod and a fresh can of propane for my offbrand bernzomatic torch (on two trips, one by train, one by bike because I didn’t realize the old one was empty till I tried to use it).

(Test fitting the 3/8 rod into the upper section of the telescoping rear post)

Then I got some of my old forging tools together. Without a proper forge or anvil, I knew it’d be pretty sloppy blacksmithing, but I didn’t need this to be particularly fancy.

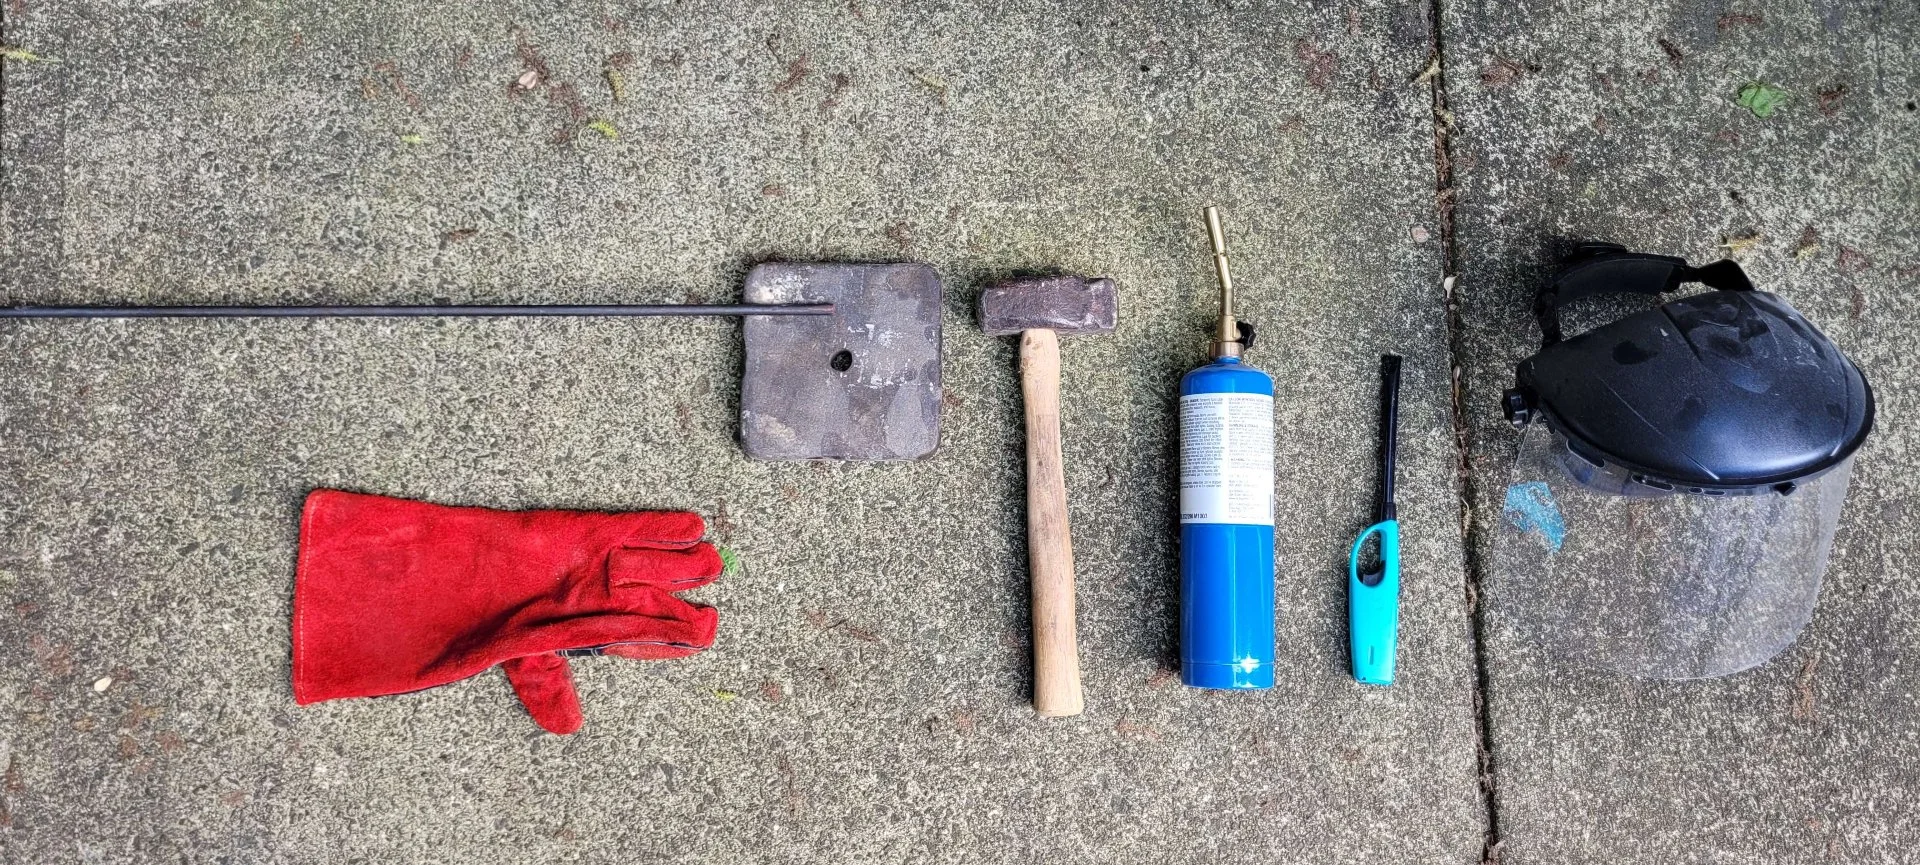
From left to right: 3/8ths steel round stock, fireplace glove, a steel block I found on the side of the road (my anvil, at the moment), my favorite forging hammer (combination round peen and straight peen), offbrand bernzomatic torch, lighter because I couldn't find my striker, and a face shield because you should wear safety goggles while forging (and this was easier to find)

I didn’t take any pictures while working because I didn’t want to waste additional fuel. Basically I just heated the end up as much as I could without a way to contain the heat, and hammered the daylights out of it whenever it seemed to be as hot as it’d get. It was halfway closer to cold forging than proper blacksmithing but I managed to spread the end of the rod flat enough to drill a hole through safely.

I used the drill press, a metal-drilling bit, and a bunch of tap oil, and went through the center of the piece without any real difficulty.

Once the hole was positioned, I used the grinder to clean up the overall shape of the forged part a little. Like the old wisdom says: a grinder and paint makes me the welder (or blacksmith) I ain’t.

(Top: the new one. Bottom: the original/stock part)

I decided to go much longer than necessary, which I suppose adds a little weight, but also some strength as we’re not relying on as much of the hollow tube it attaches to for structural support.

Once it was cleaned up and the oil removed, I spraypainted it. It would have been easy to go with Gloss Black to match the rest of the bike rack (I had a can of it handy) but I decided to paint it blue. I’d just put some work into making this part custom, and I’m working on rethinking if my goal needs to be to make something look like a product in the first place. For now I don’t mind calling a little attention to it.

Plus, the bike never looked great, which works great for me. One of my relatives found it rusting in a sandpit, gave it to me my first job away from home, and I’ve replaced piece after piece back when it was my sole means of transportation. For quite awhile it was held together with zip ties and various kinds of tape (and featured a fender made from cut-up gatorade bottles and duct tape) and the overall look meant it wasn’t exactly a high priority target for theft.

I gave the paint the full 24 hours to dry, then assembled the last bit of the rack.

Looking decent!

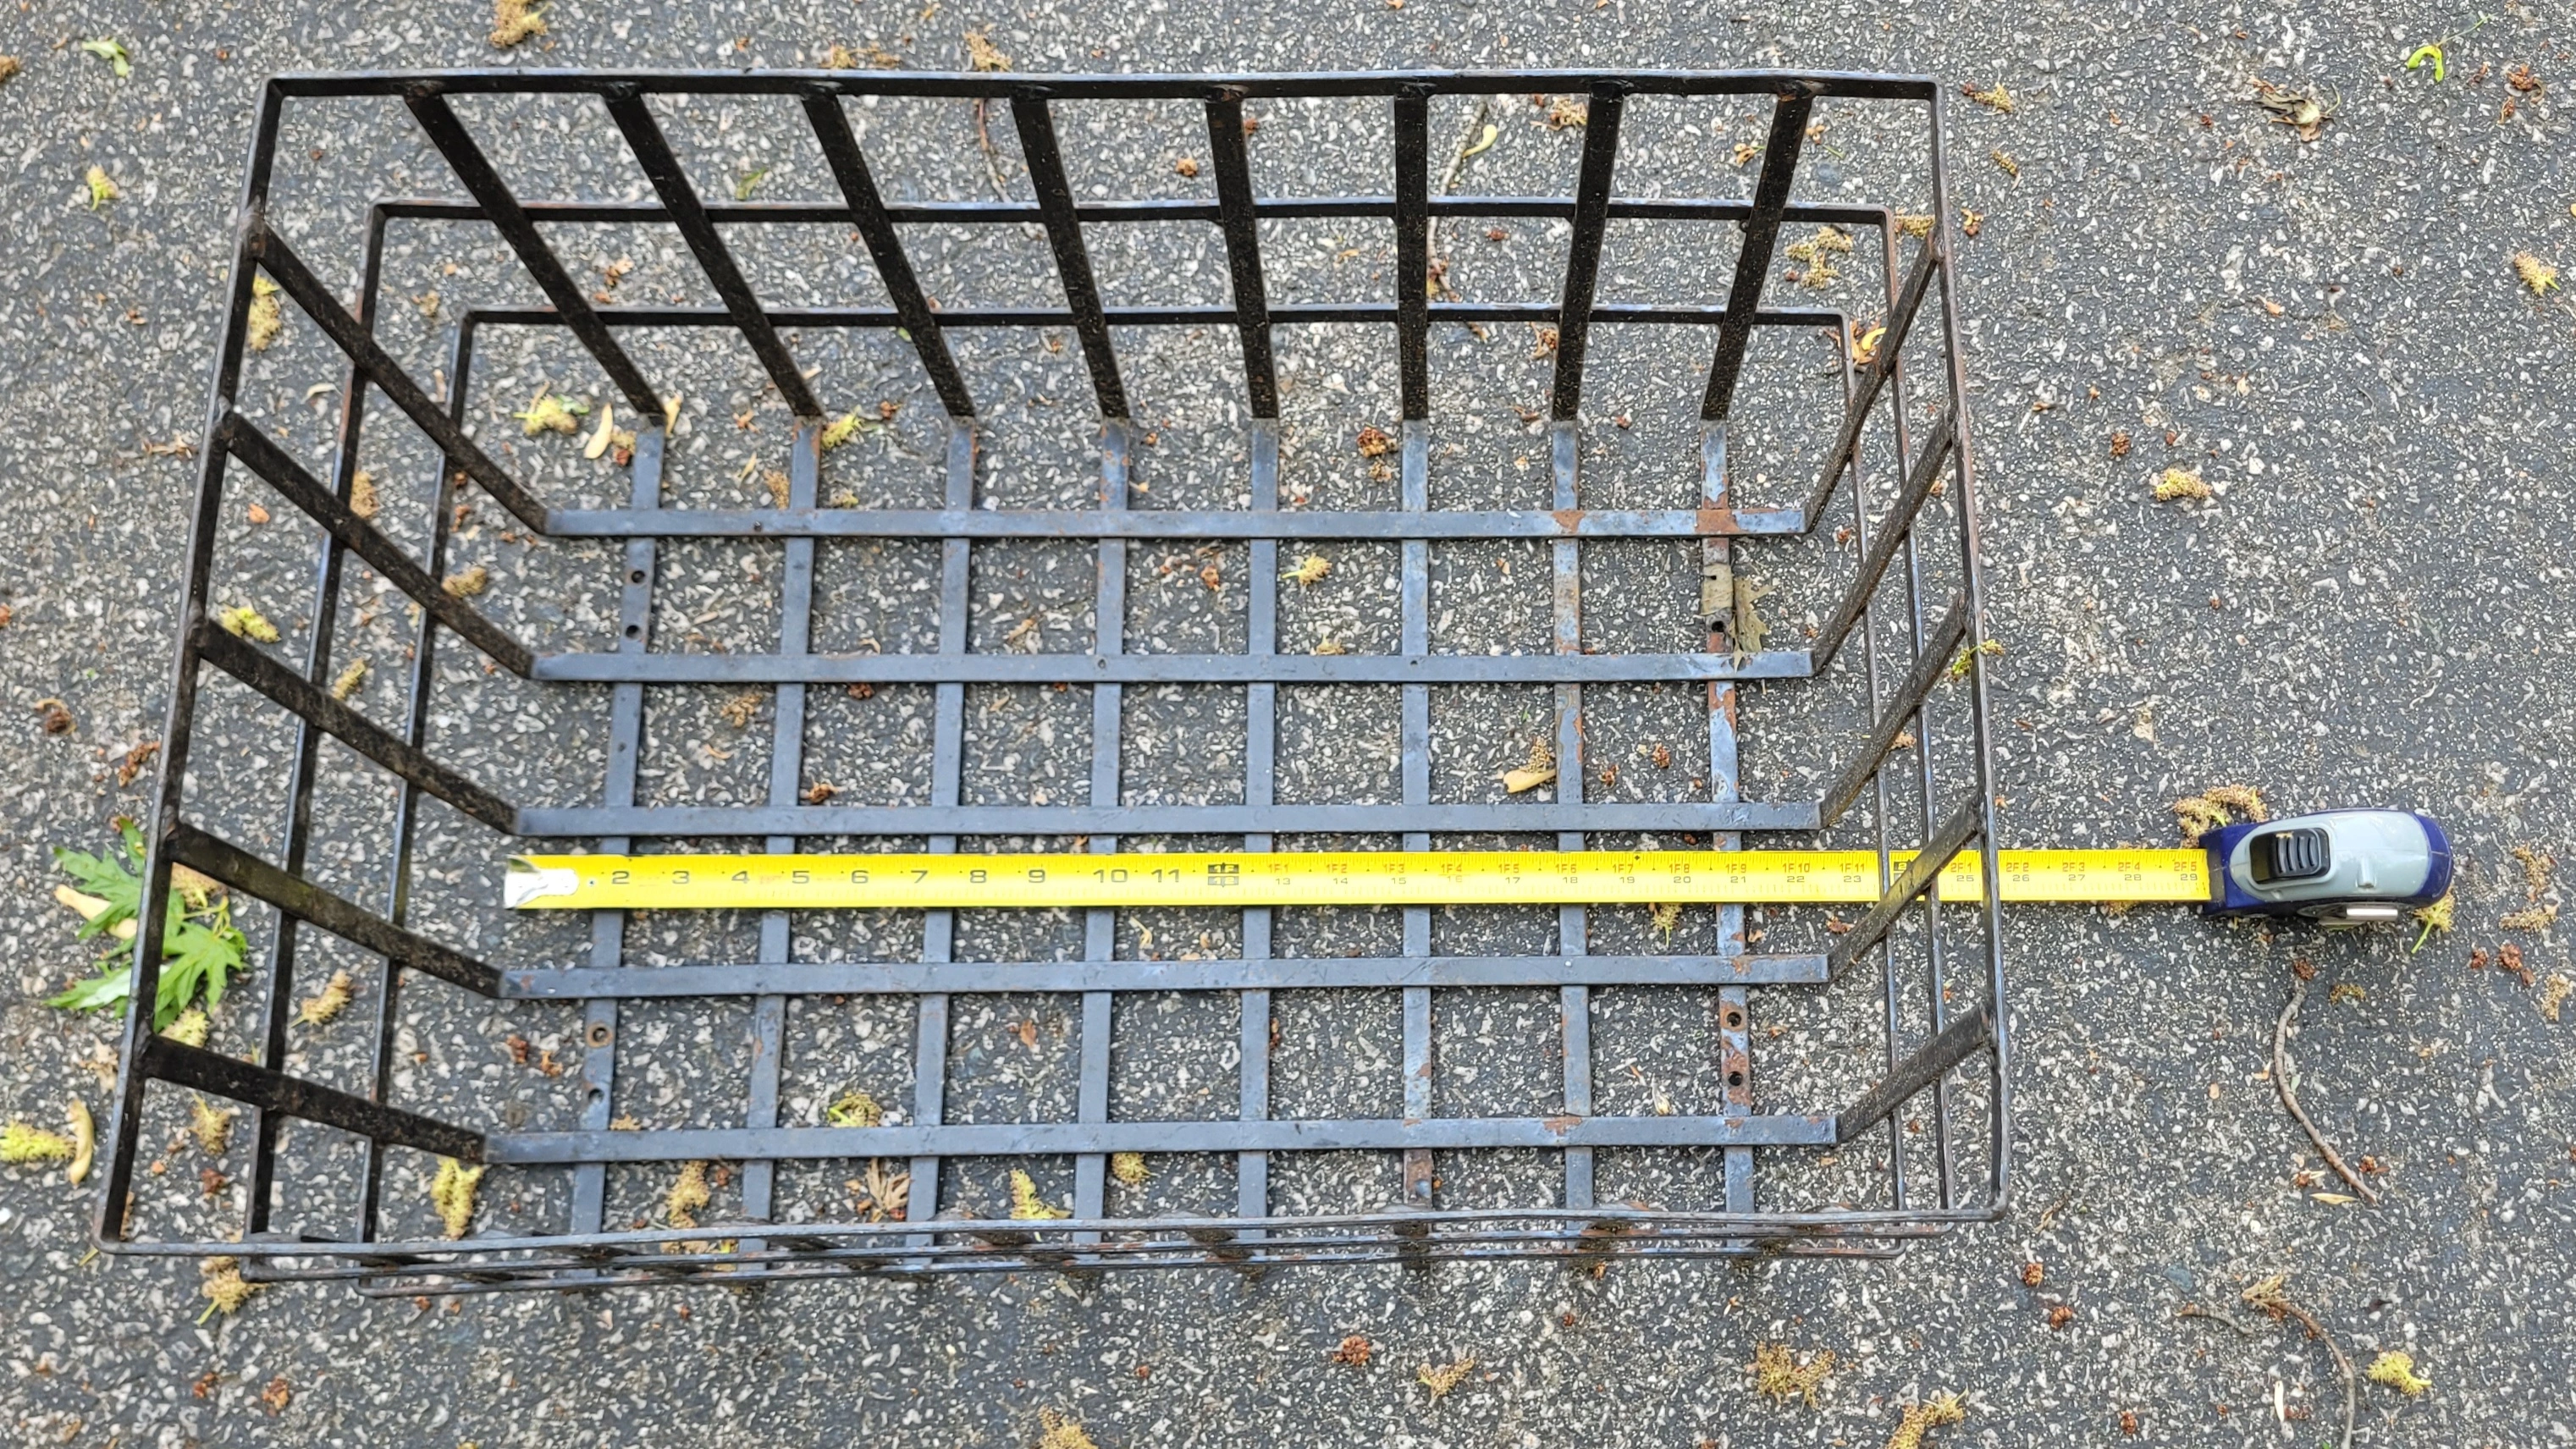
I have some panniers a relative gave me to hang over the rack if I can ever figure out how these straps work, but I wanted to see if it would work with a big steel basket I got out of a dumpster awhile back.

Turns out it’s ridable, though heavier than I'm used to. Cargo would likely make it even more tippy, though maybe not more so than those child seats I've seen around? Just the same, I suspect if “bicycle pickup truck” was a good idea, more people would be doing it so I'll swap on the panniers soon.

Next steps will be to add panniers, better brakes (per the previous post), and I think a frame bag and a handlebar basket.

Edit: I've removed the basket and I think I understand the paniers. I just don't trust the attachment system to stay attached and not get tangled up in the rear wheel and chain. Each side has an adjustable strap with a hook, and a loop of strap sewn on. It just seems like with the flex and stretch of the cloth bags as the bike moves and bounces along, it'd be too easy for the hook to come unhooked, at which point it'd be awesome at snagging a spoke or something. So I've got it hooked together I think the way it's intended, and a few zip ties should make sure it stays that way. When I go to buy bigger panniers someday (these are fairly small) I think I'll want ones with buckles or something more secure but still removable.
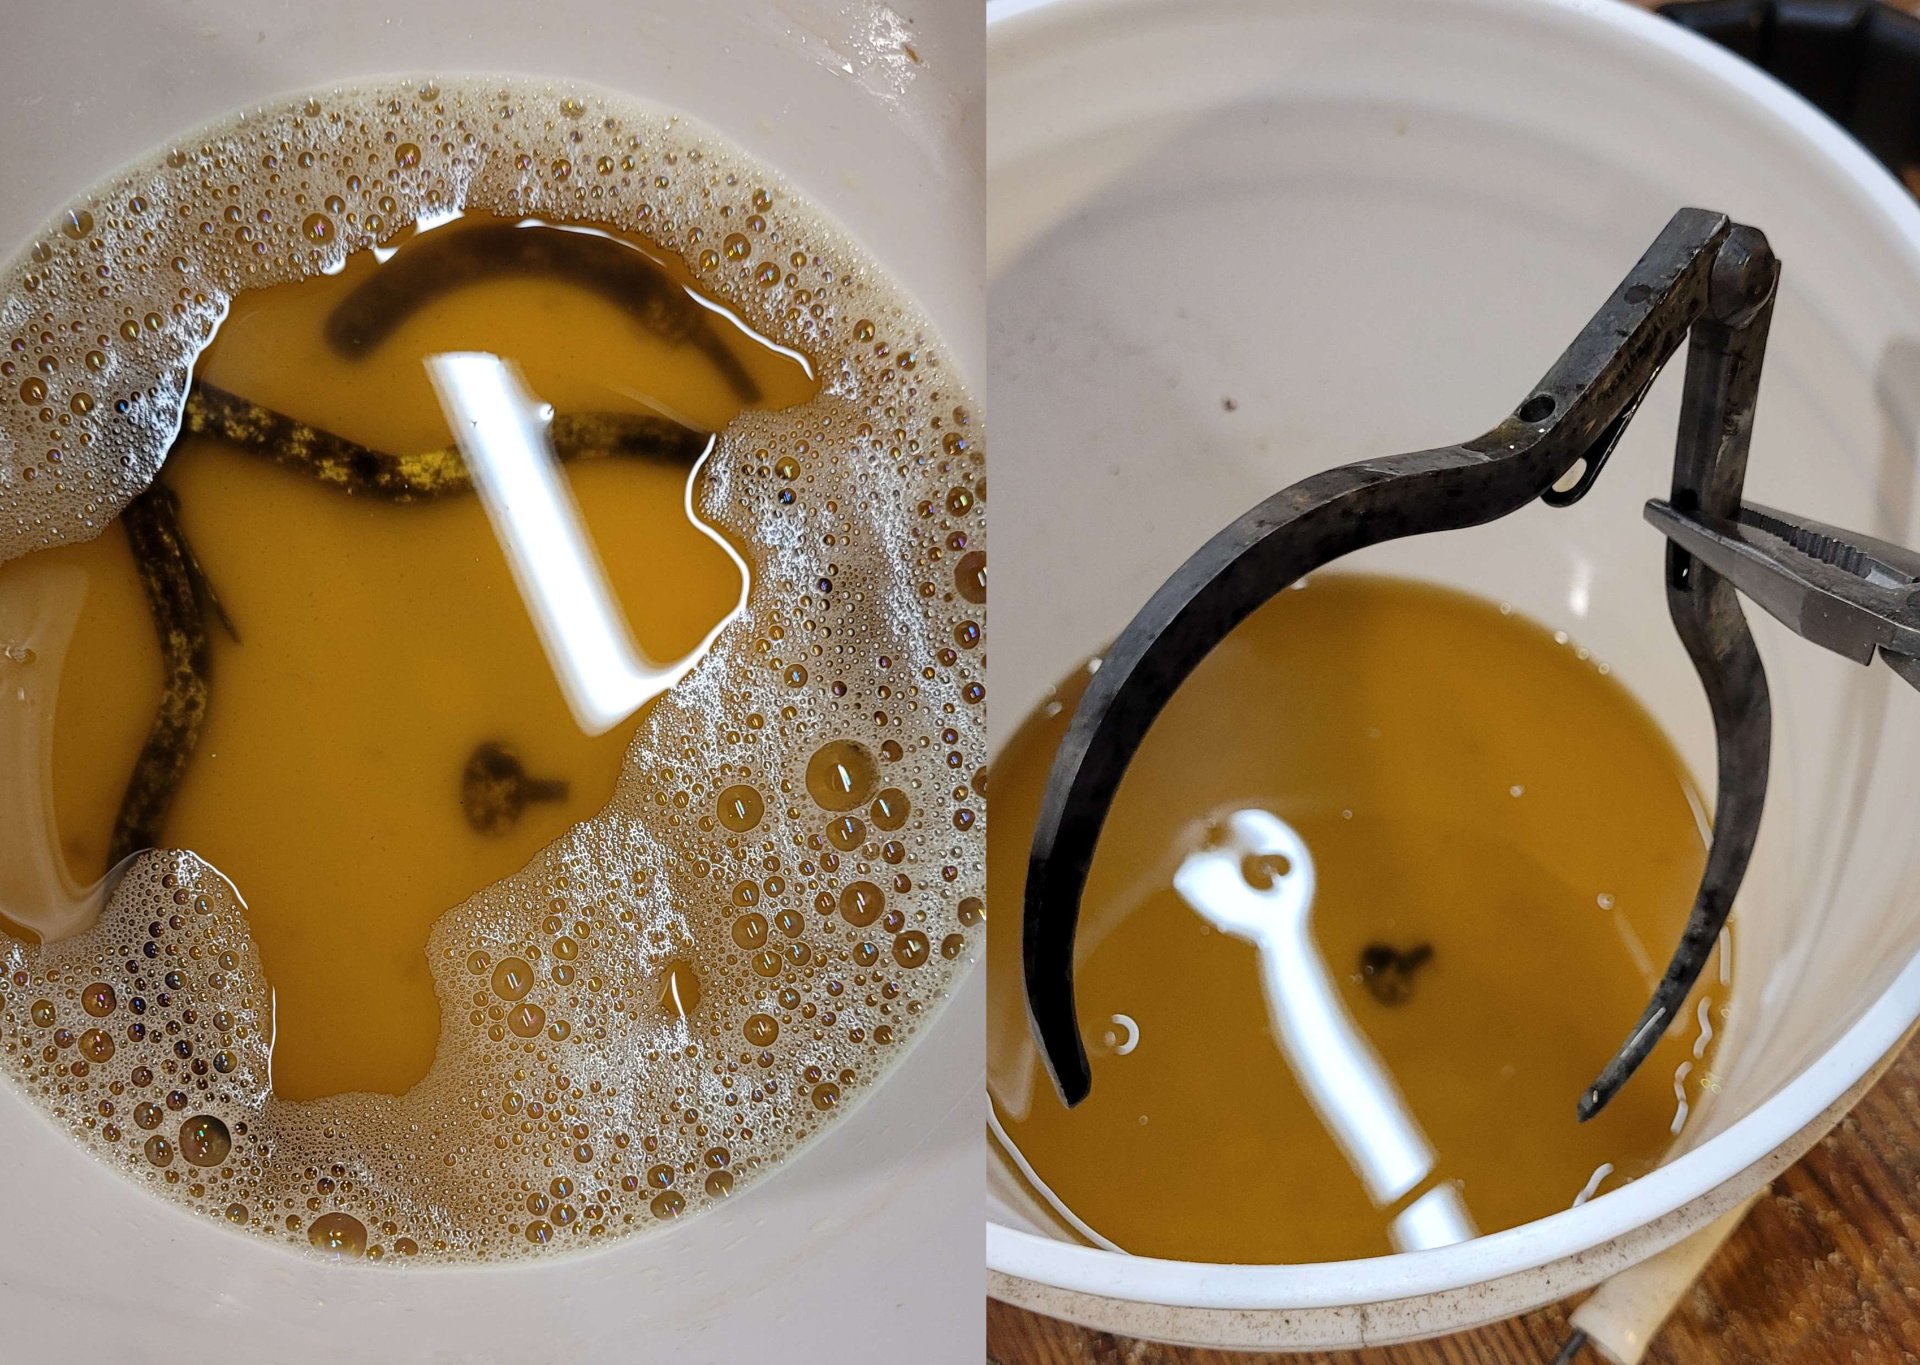
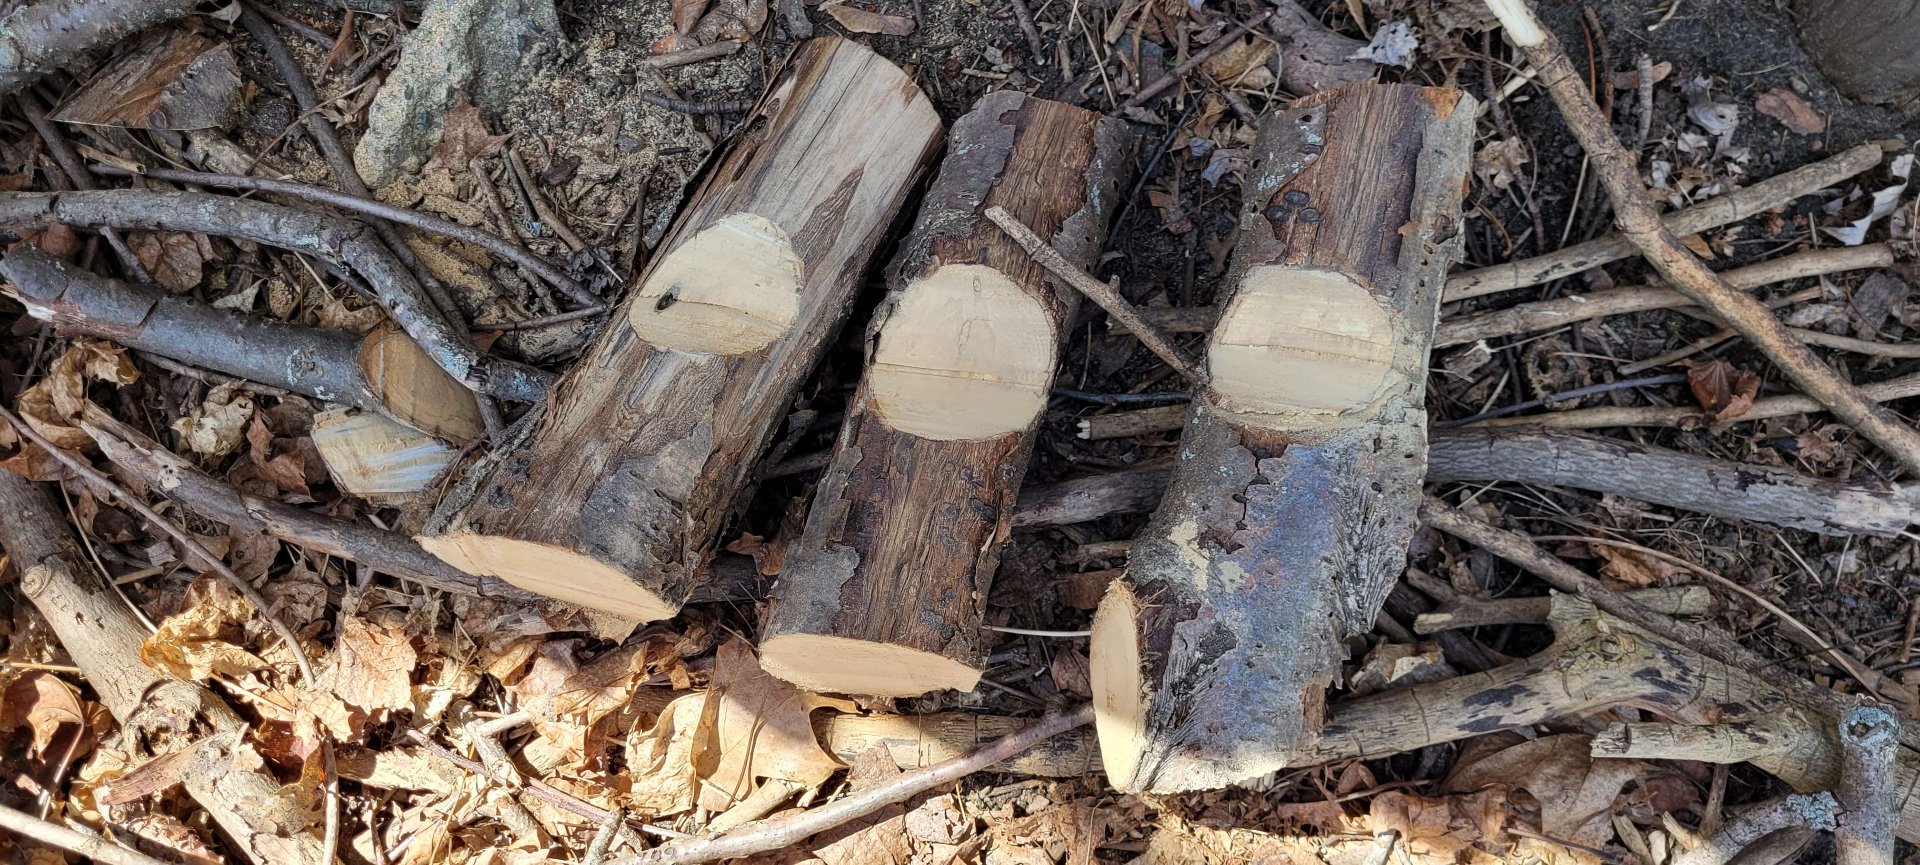
1

The image shows several stickers attached to a metal pole. Near the center is a black and white cartoon raccoon in a dress surrounded by colorful flowers.

32
Bee House Update (slrpnk.net)
submitted 2 weeks ago* (last edited 2 weeks ago) by JacobCoffinWrites@slrpnk.net to c/nolawns@slrpnk.net

I posted awhile back after making a home for solitary bees, sharing that it had gotten some use. Its important to replace the sticks annually to prevent parasites from being passed from bee to bee as holes are reused.

Thanks to some winter storms, we had lots of downed branches to clear, so I had no shortage of sticks available for use as future bee housing:

(One pile of many)

The holes need to be between 5" and 6" deep, so I started cutting the sticks into 6.5"-ish lengths.

This doesn't look like much but it took a lot of eight-foot branches to make these piles.

The next step was drilling holes. Different size bees need different diameter holes, so I read a few guides and picked out a range of drill bits between a metric #2 and a full half-inch (I don't think solitary bees care about unit standardization) to make sure any potential tenants can find a cozy caliber to call home.

I used the drill press to start the holes then used a set of extra long metric bits in a screwgun to get the full length the bees need

This didn't always go perfectly. I didn't break any bits, but sometimes the holes were crooked enough to punch through the side of the stick and I'd set them aside.

Then I just had to bag up what I'd made and replace the sticks in the bee house:

(Background omitted because it's easier than tidying the shop.)

I'd thought I'd made enough sticks for two years, but it took almost all of them to fill the bee house. Glad I prepared as many as I did.

I think I'd call that move-in ready.

35

Awhile back I posted that one of my cyberpunk short stories got picked up by an anarchist fiction zine. I was excited because I had this related-but-sort-of-mutually-non-canonical photobash comic ready to go, which played with the same concept but in a different tone.

I don't want to spam this community with my comic weekly or anything, so I figured I'd just share a few still panels, spaced out whenever I get to them in the posting schedule. They're just quiet bits of art between the jokes.

Hopefully that's all okay, and if you do want to read this silly webcomic about a stolen secret service protoptype and the endangered deer it thinks is the president I'm posting it weekly here or here

63
Caliper Fixup (slrpnk.net)

I bought this set of outside calipers at a junk store in my hometown (sort of a consignment, thrift store deal, with lots of old furniture, and the contents of like half a dozen garages right down to the old jars of mismatched screws. I sort of use it like a hardware store).

I like this design a lot, I like the lack of a spring on the jaws, and that you can fasten the little distance measuring arm to the side it measures on, so you can close the calipers around something, tighten that wing screw, then open the calipers to get them back.

They had some surface rust, so I decided to clean them up. The first step was to disassemble them. Not difficult when there's only three pieces involved.

I let them soak in some evaporust for about 8 hours. I really like this stuff, it hits the sweet spot between very effective and not especially dangerous, and it's reusable! They do overestimate how effective it is in their instructions though, so it often takes longer.

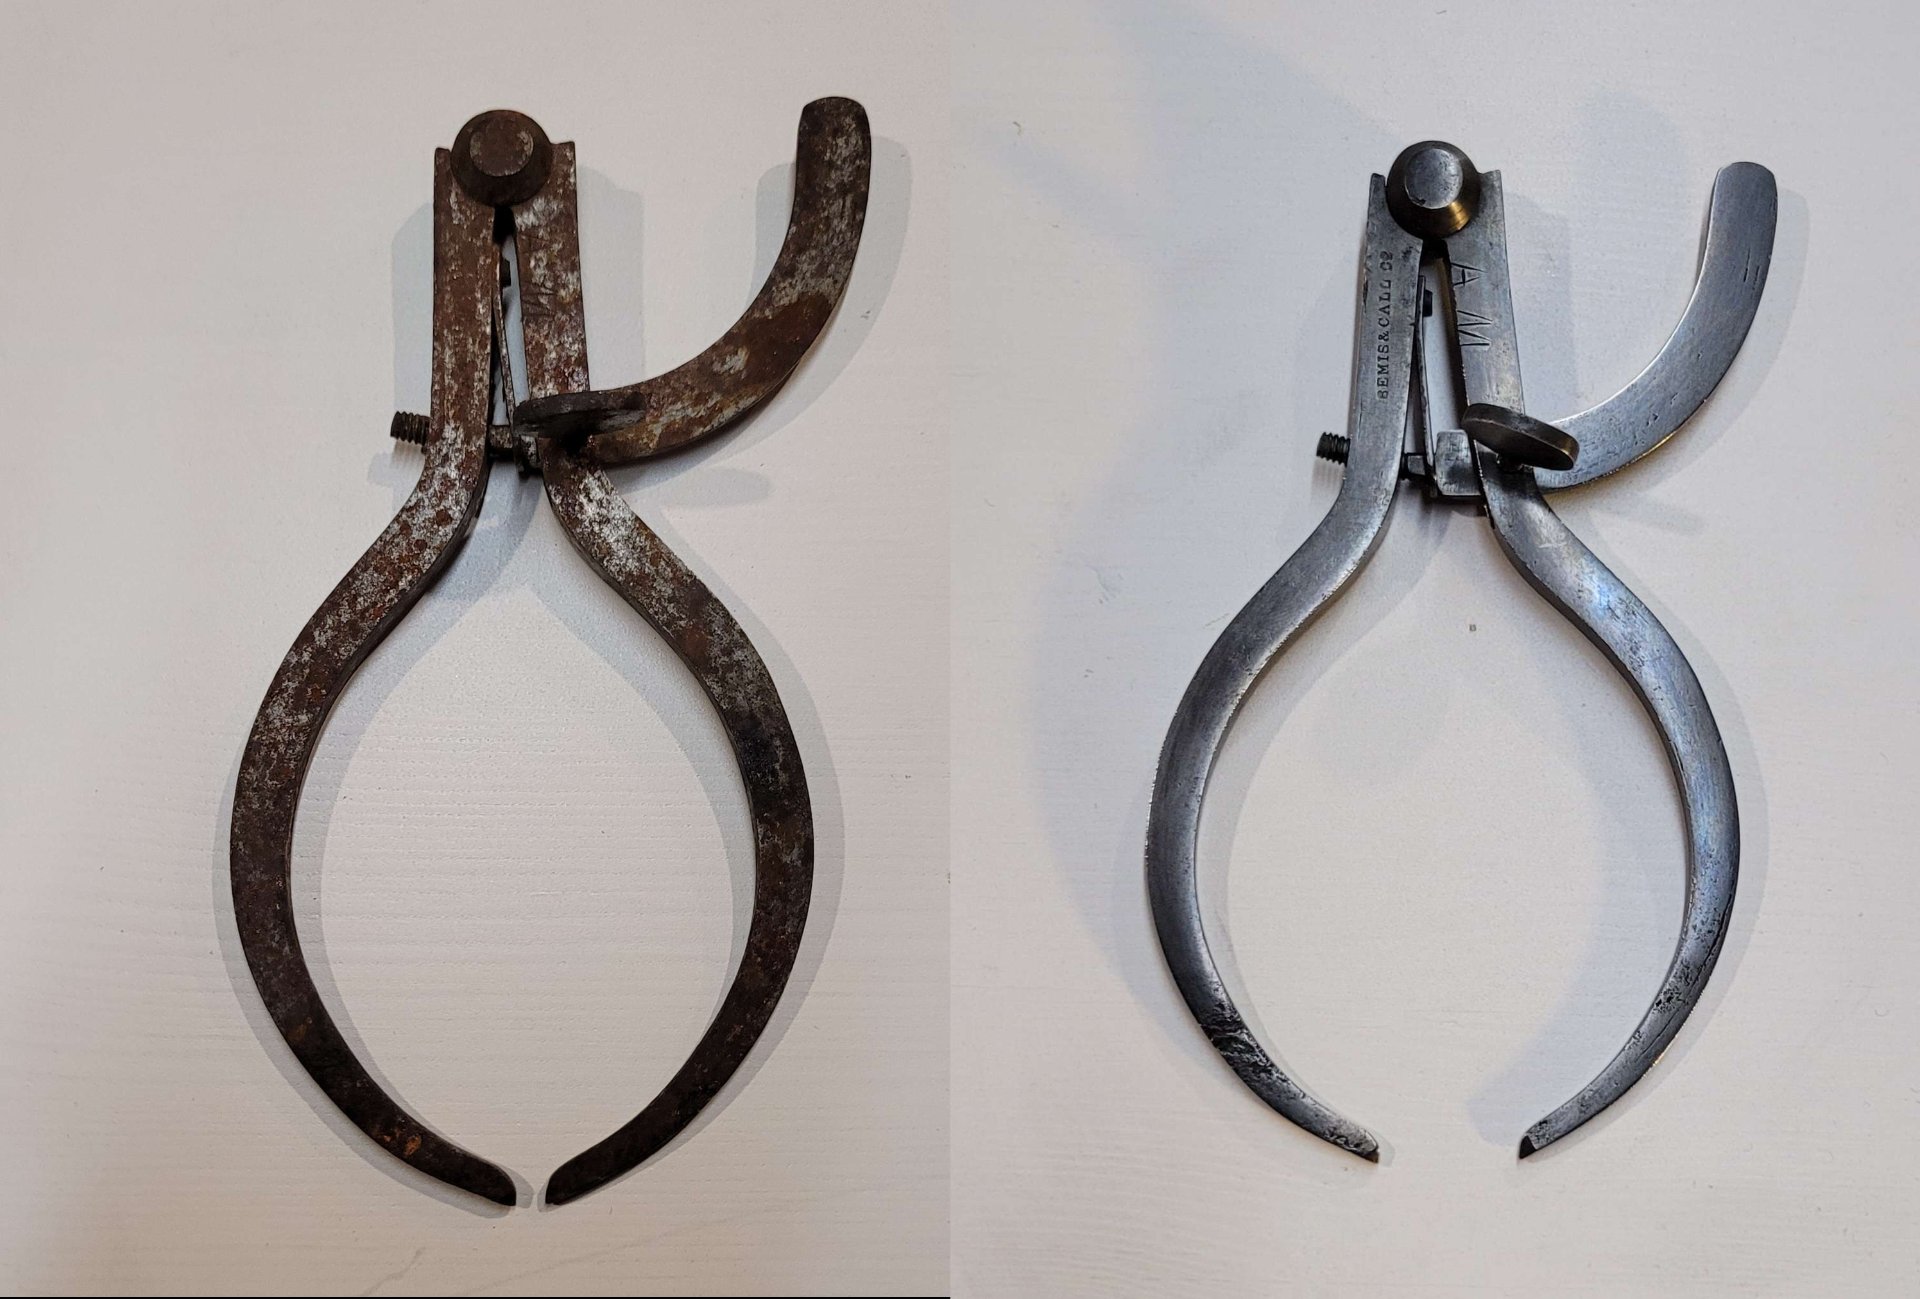
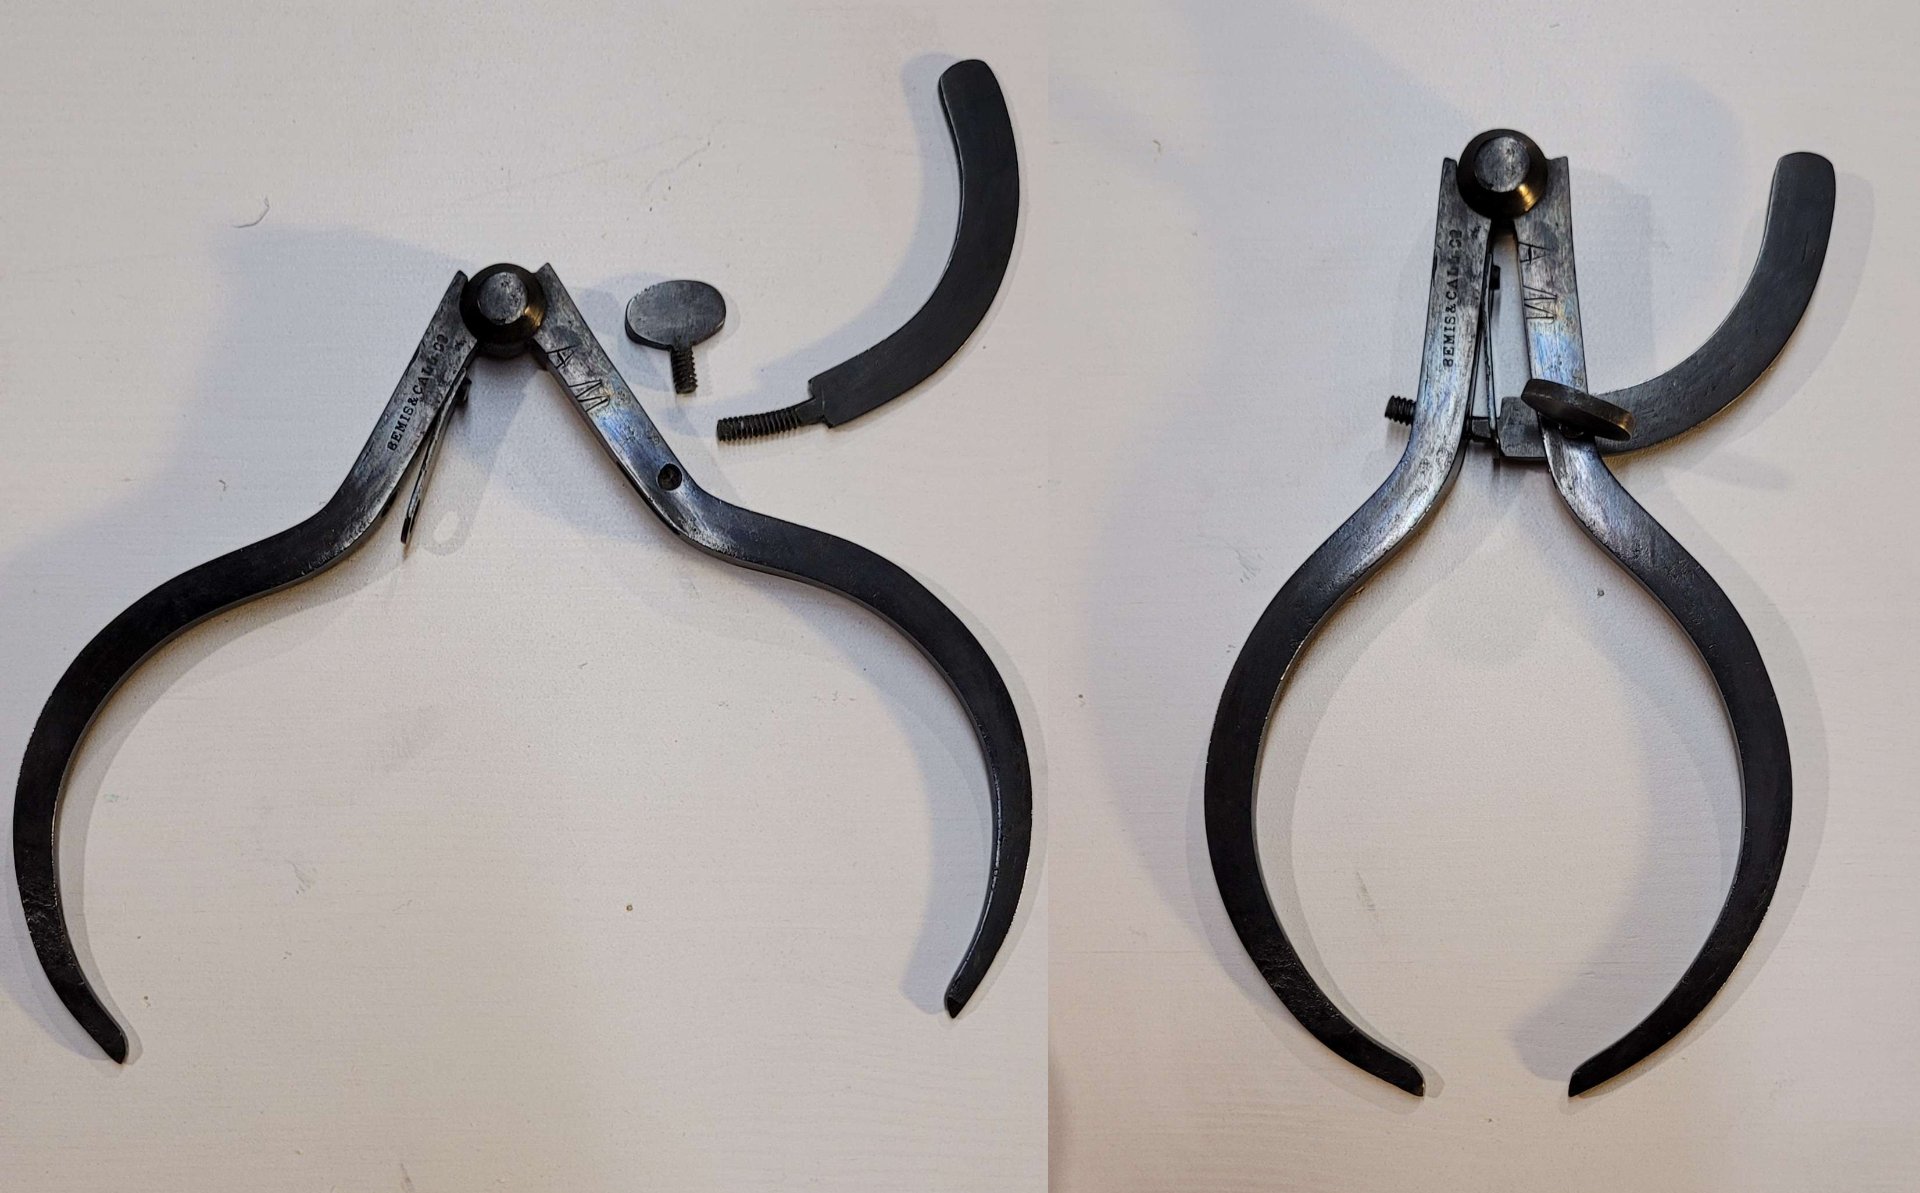
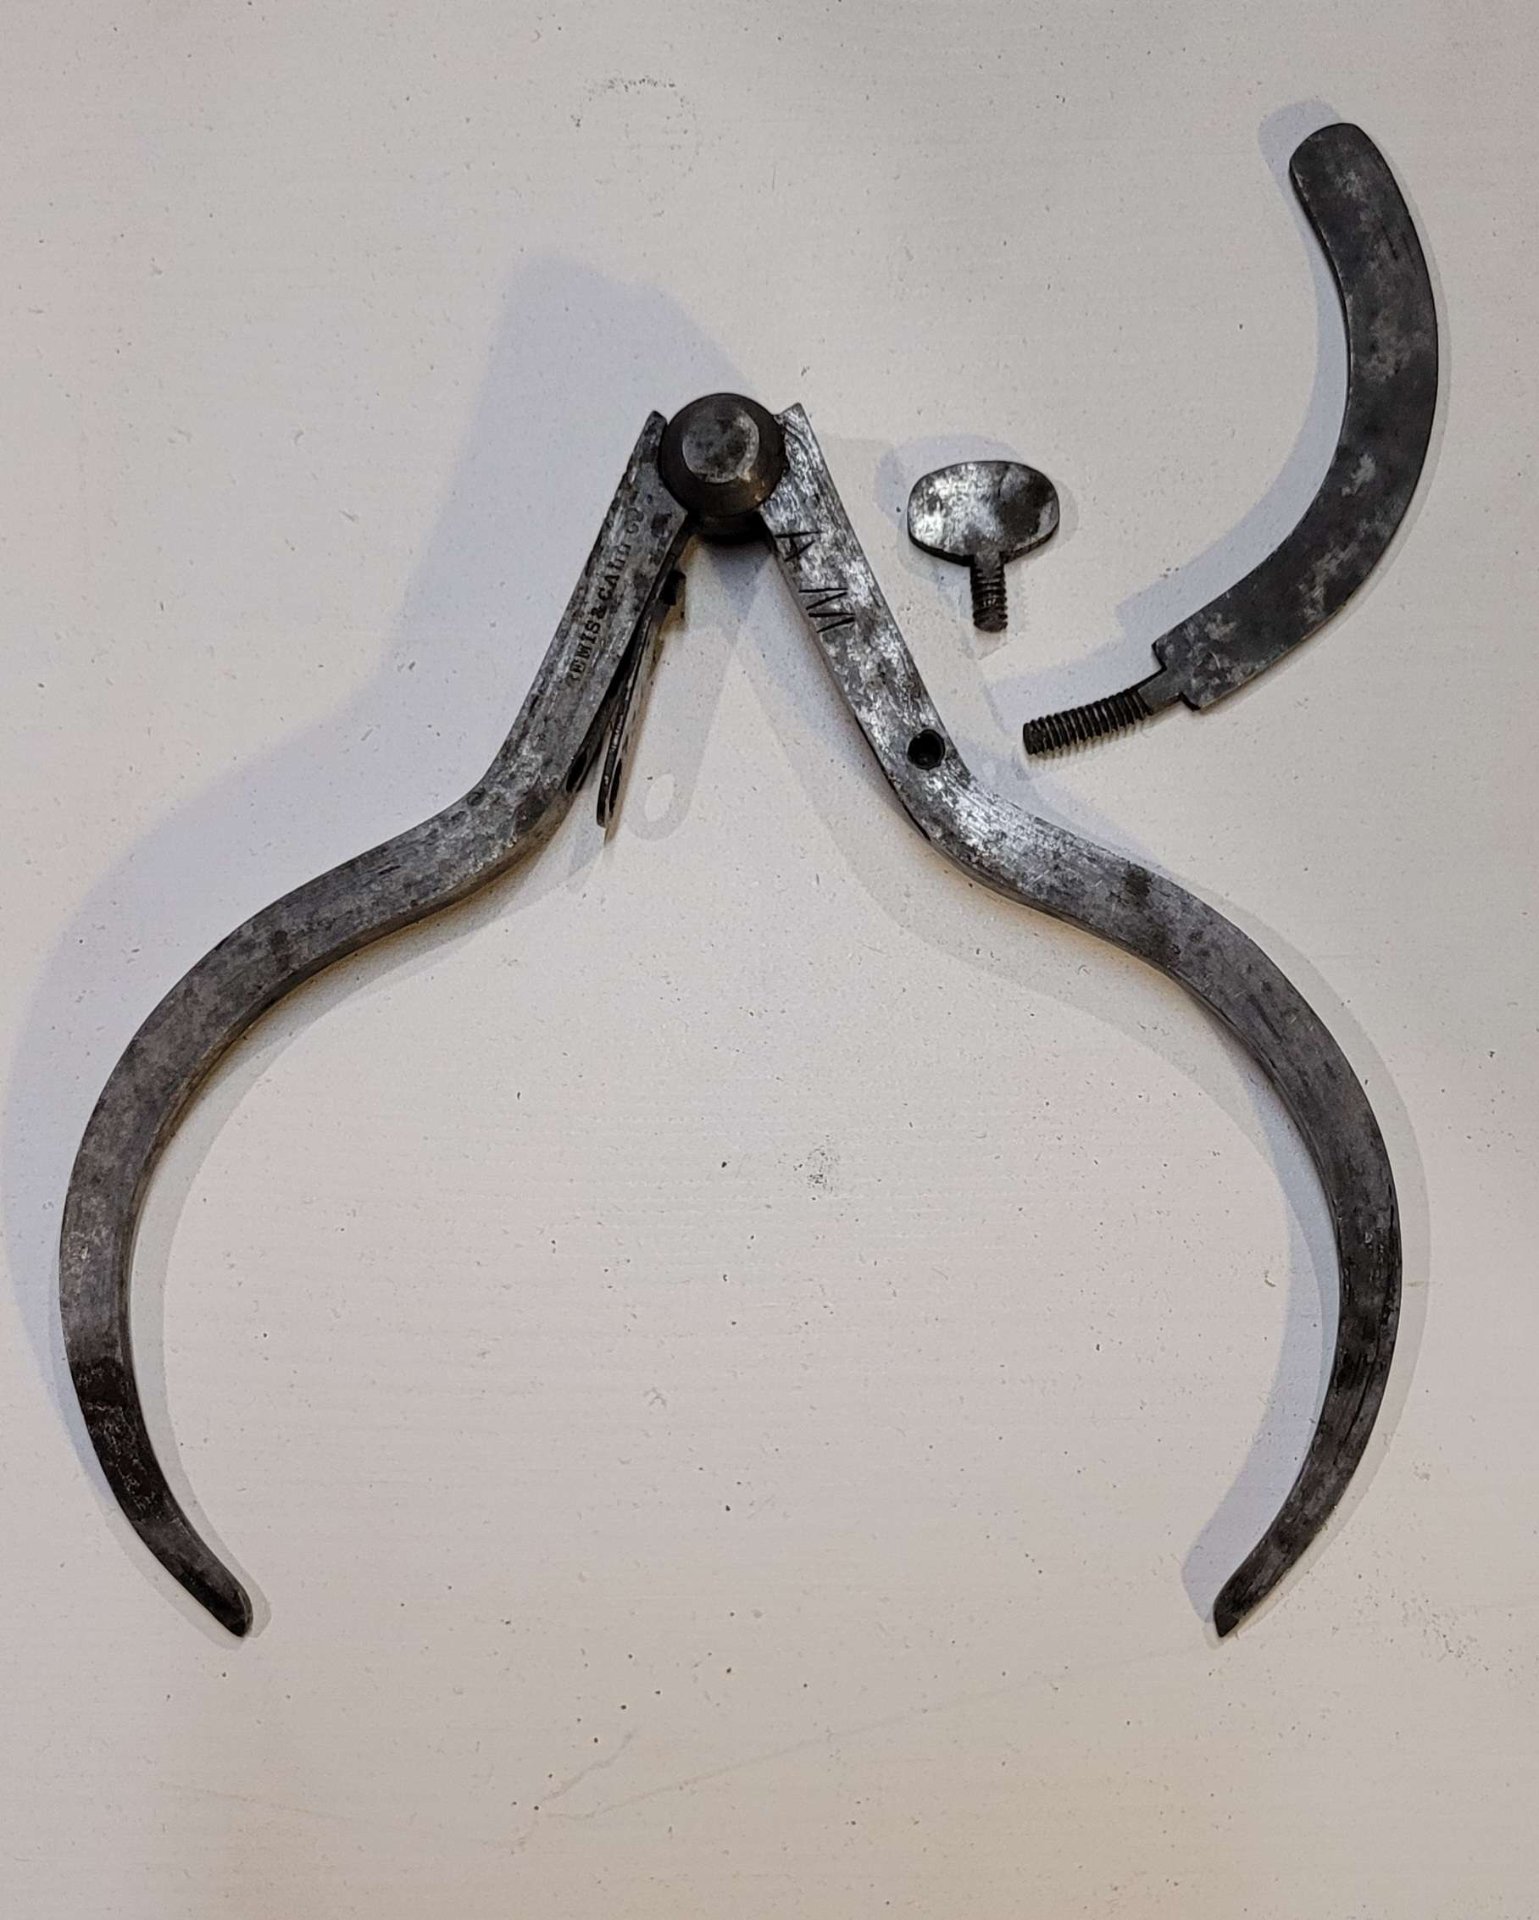
The calipers, straight out of the evaporust. You can already see some text which was hidden before, along with the initials AM from a previous owner.

Now that the worst of the rust had been dissolved, it was time to switch from chemical to mechanical cleaning. I sanded it down with 400 grit emery cloth.

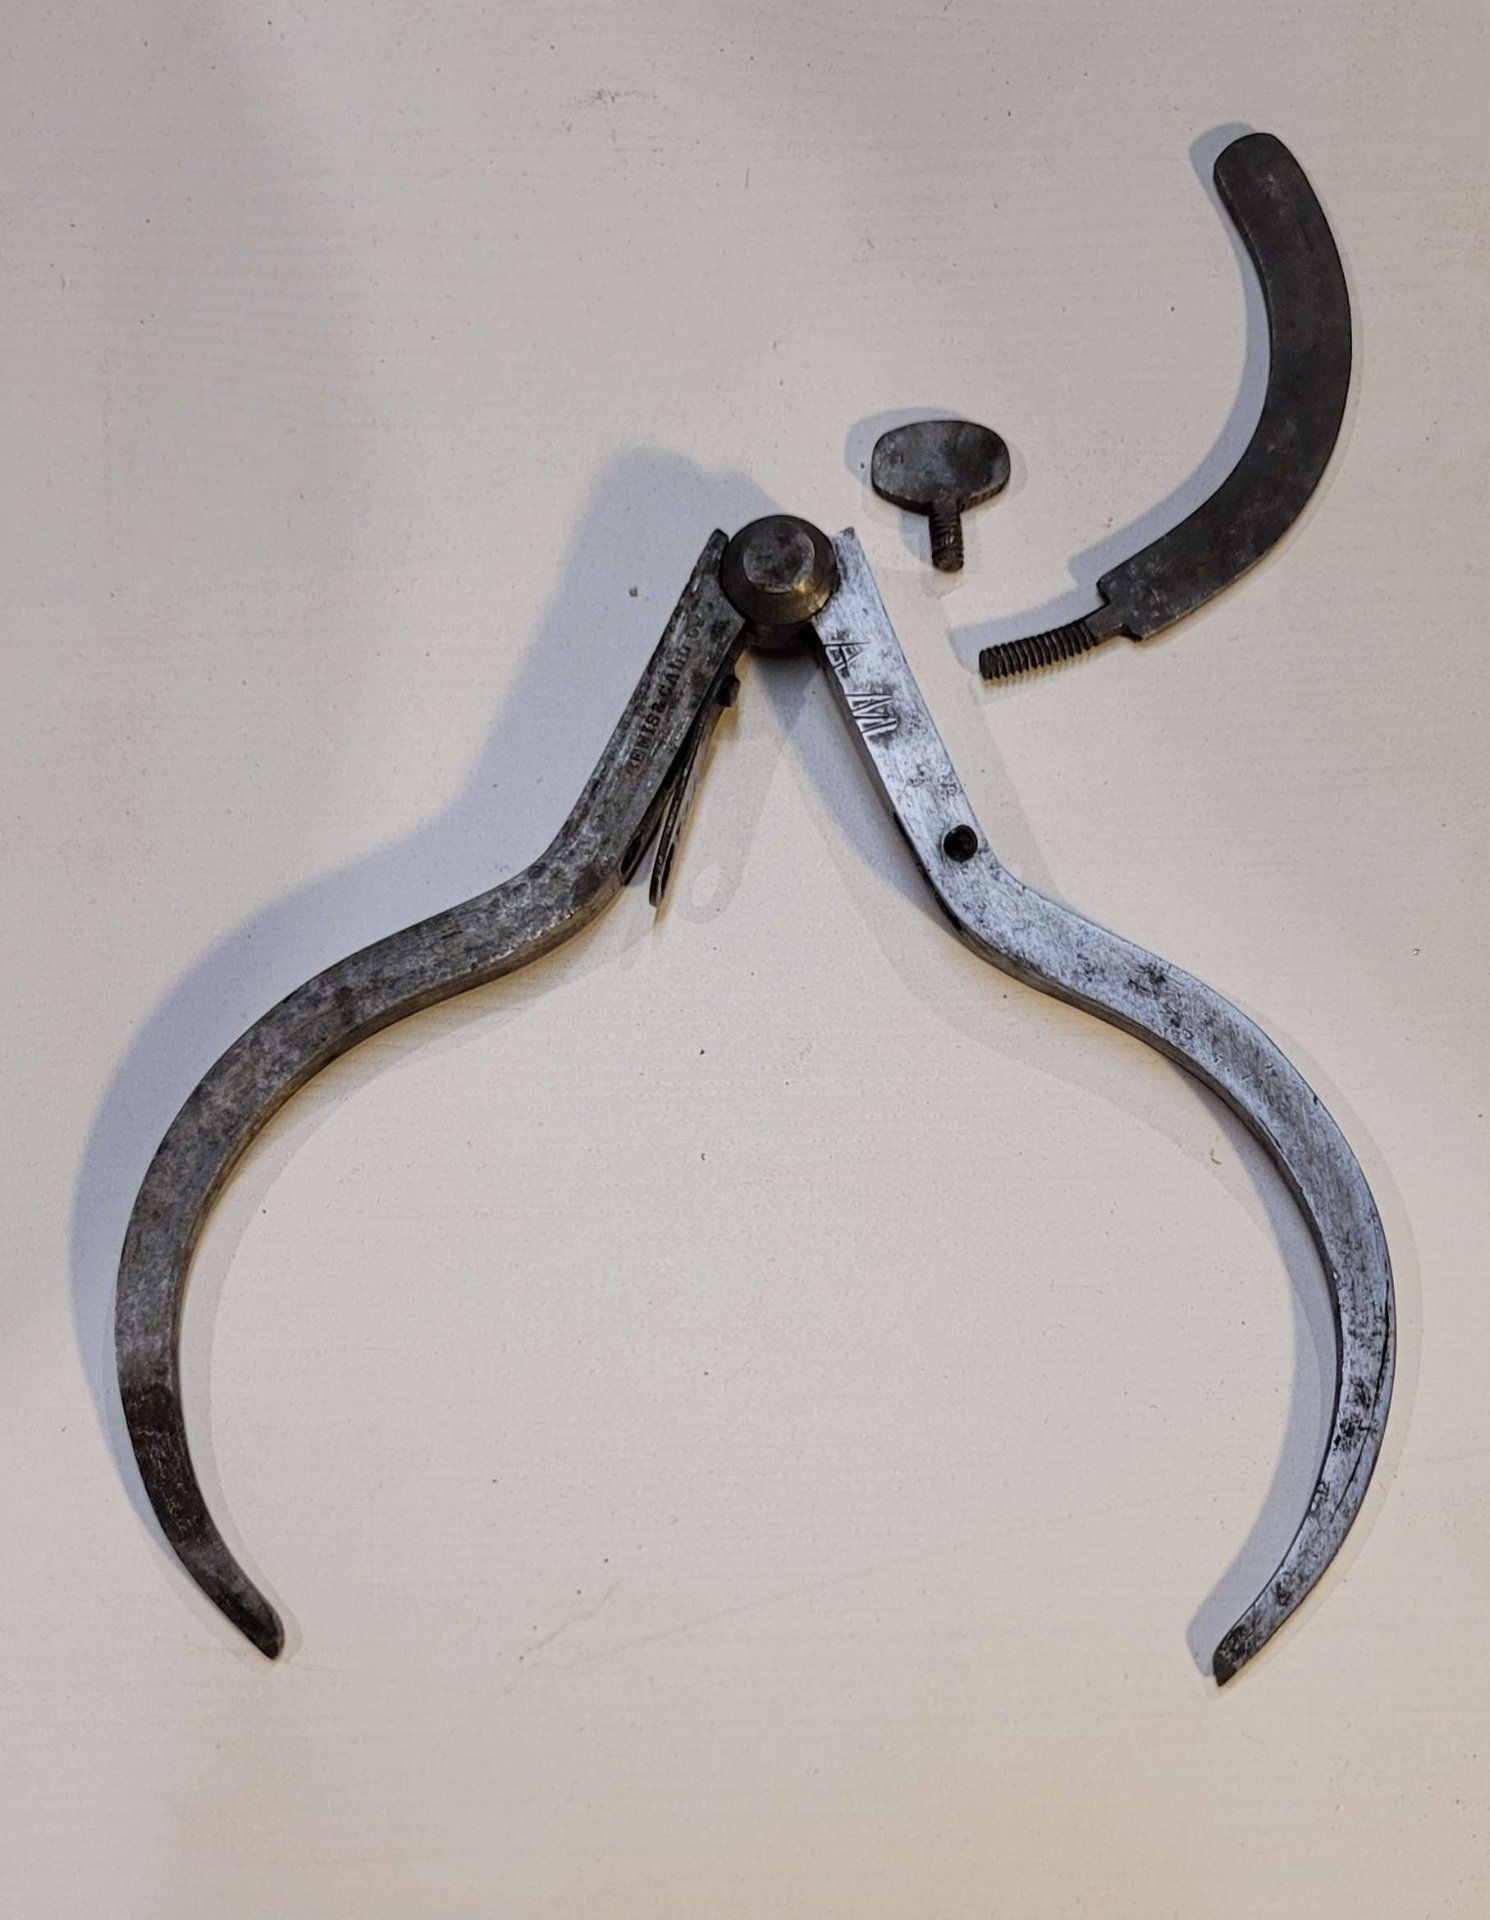
The calipers with only one side sanded.

As I cleaned up the sides, I found a few neat bits of history:

Here's some funny nicks up near the joint on one side. I wonder what caused them. And the previous owner's mark on the right side, AM. This is a big part of why I love old tools. I love the history they carry with them, even if I don't know all of it.

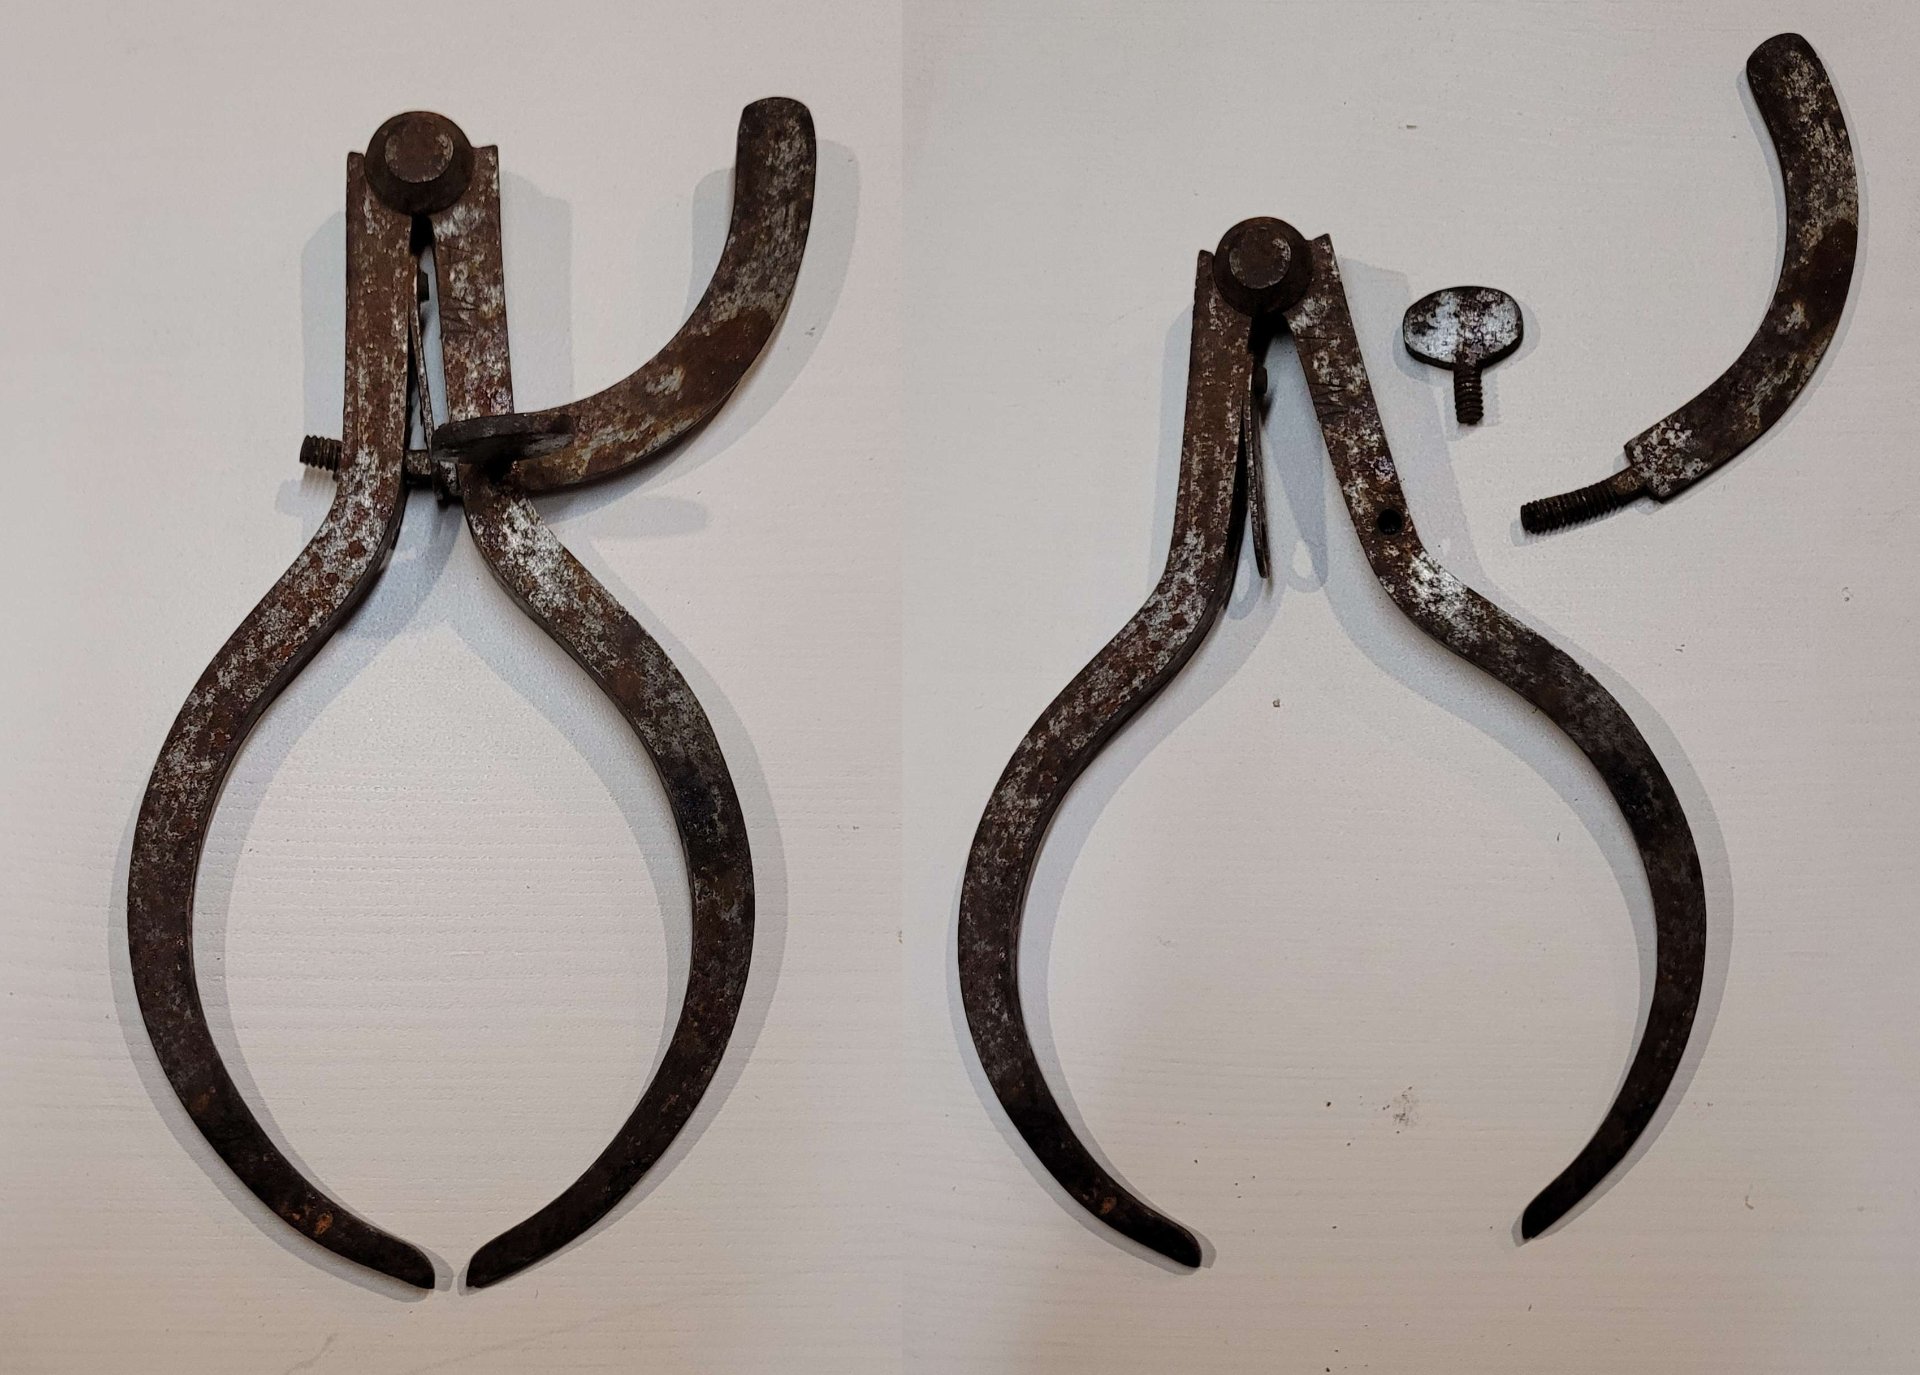
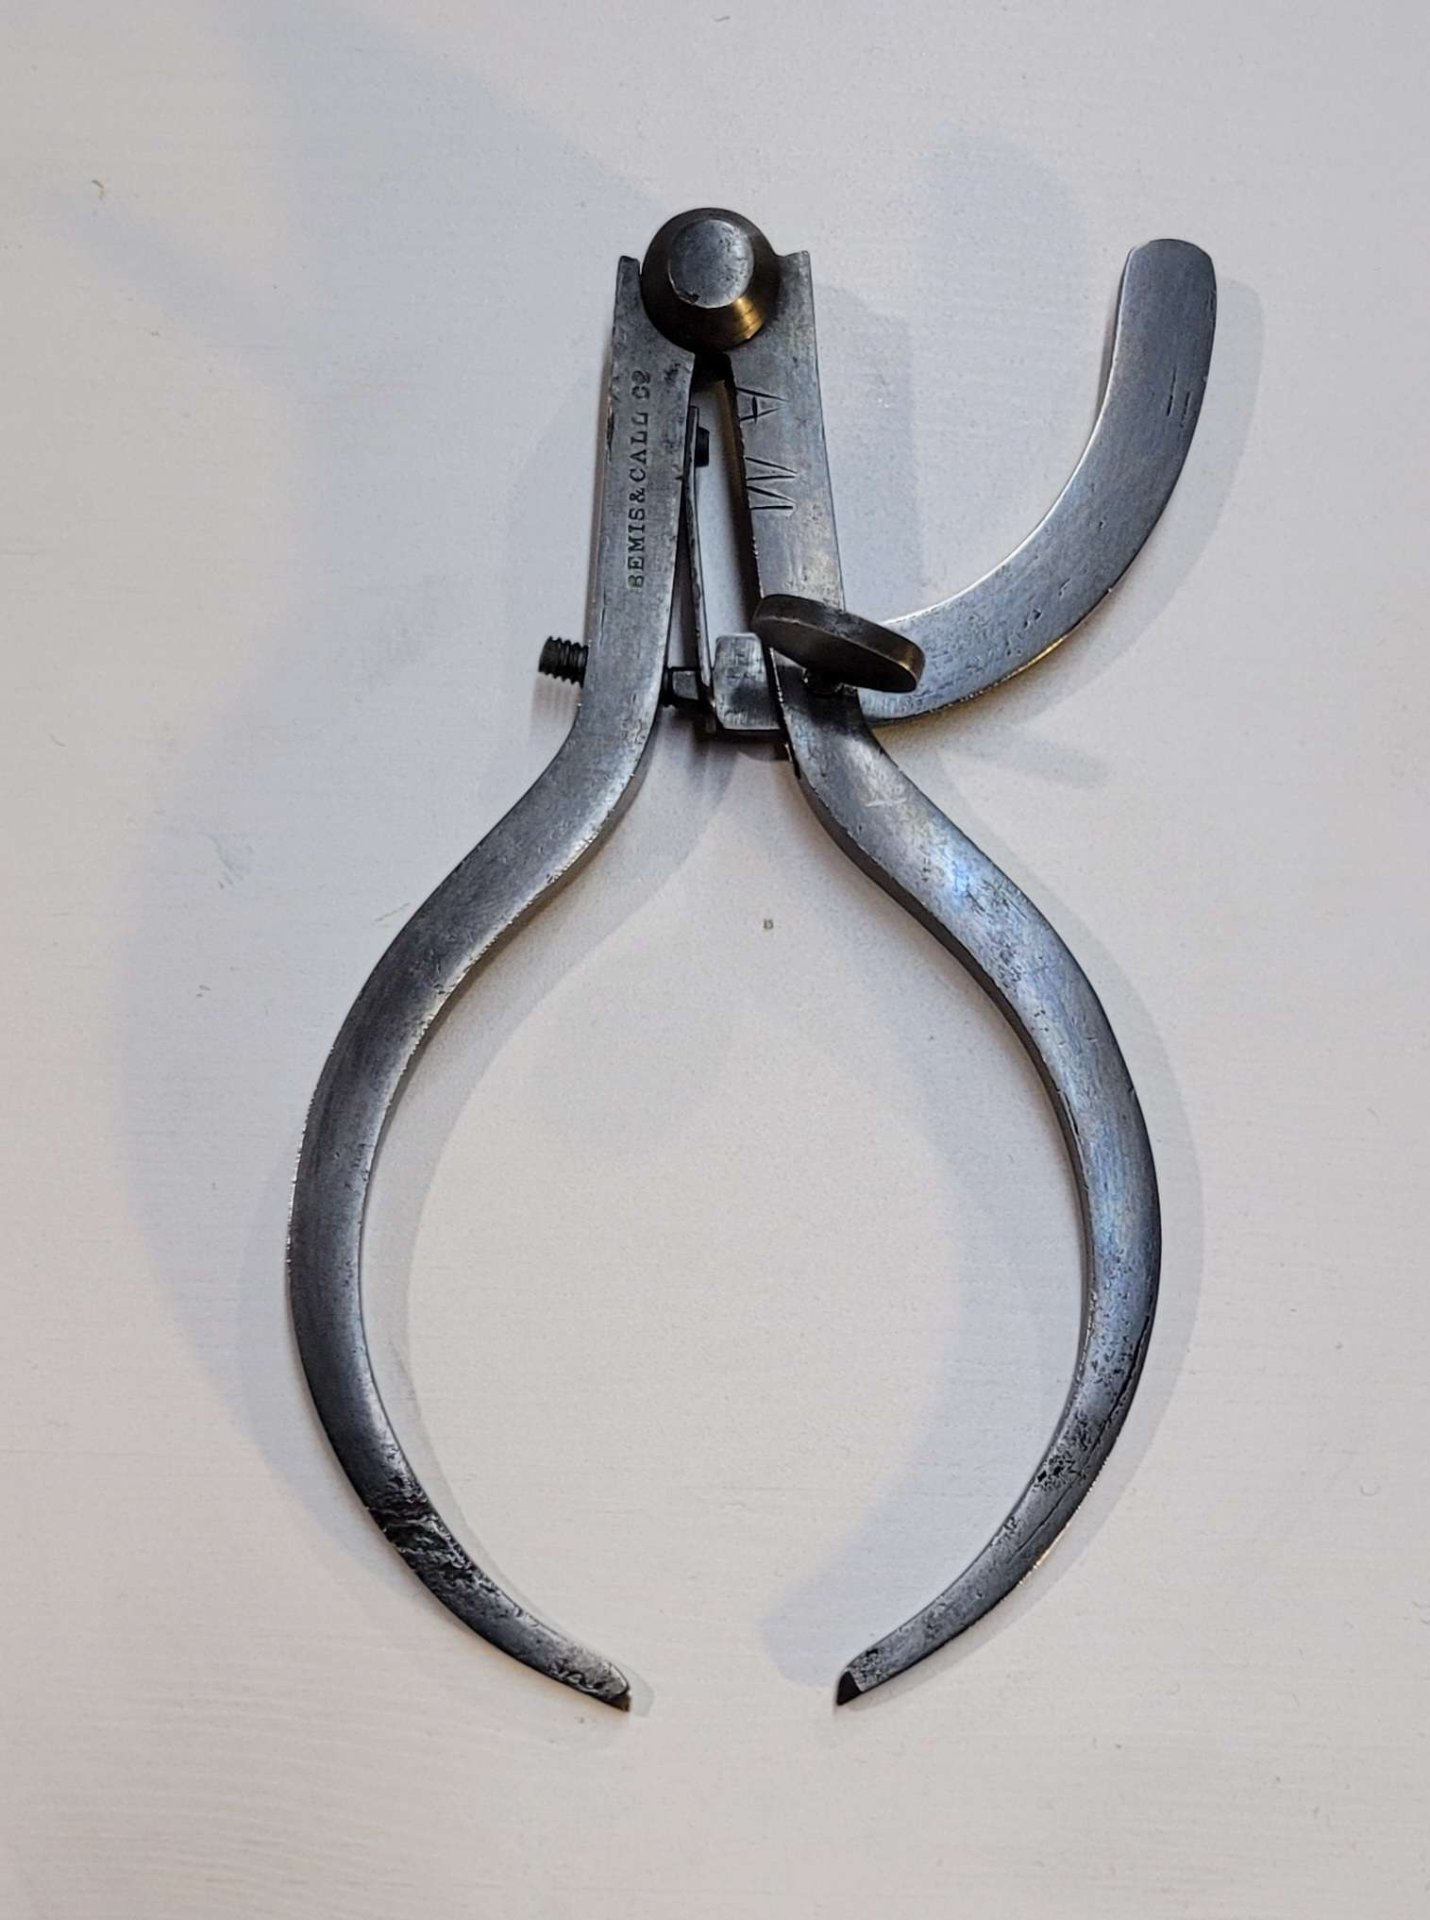
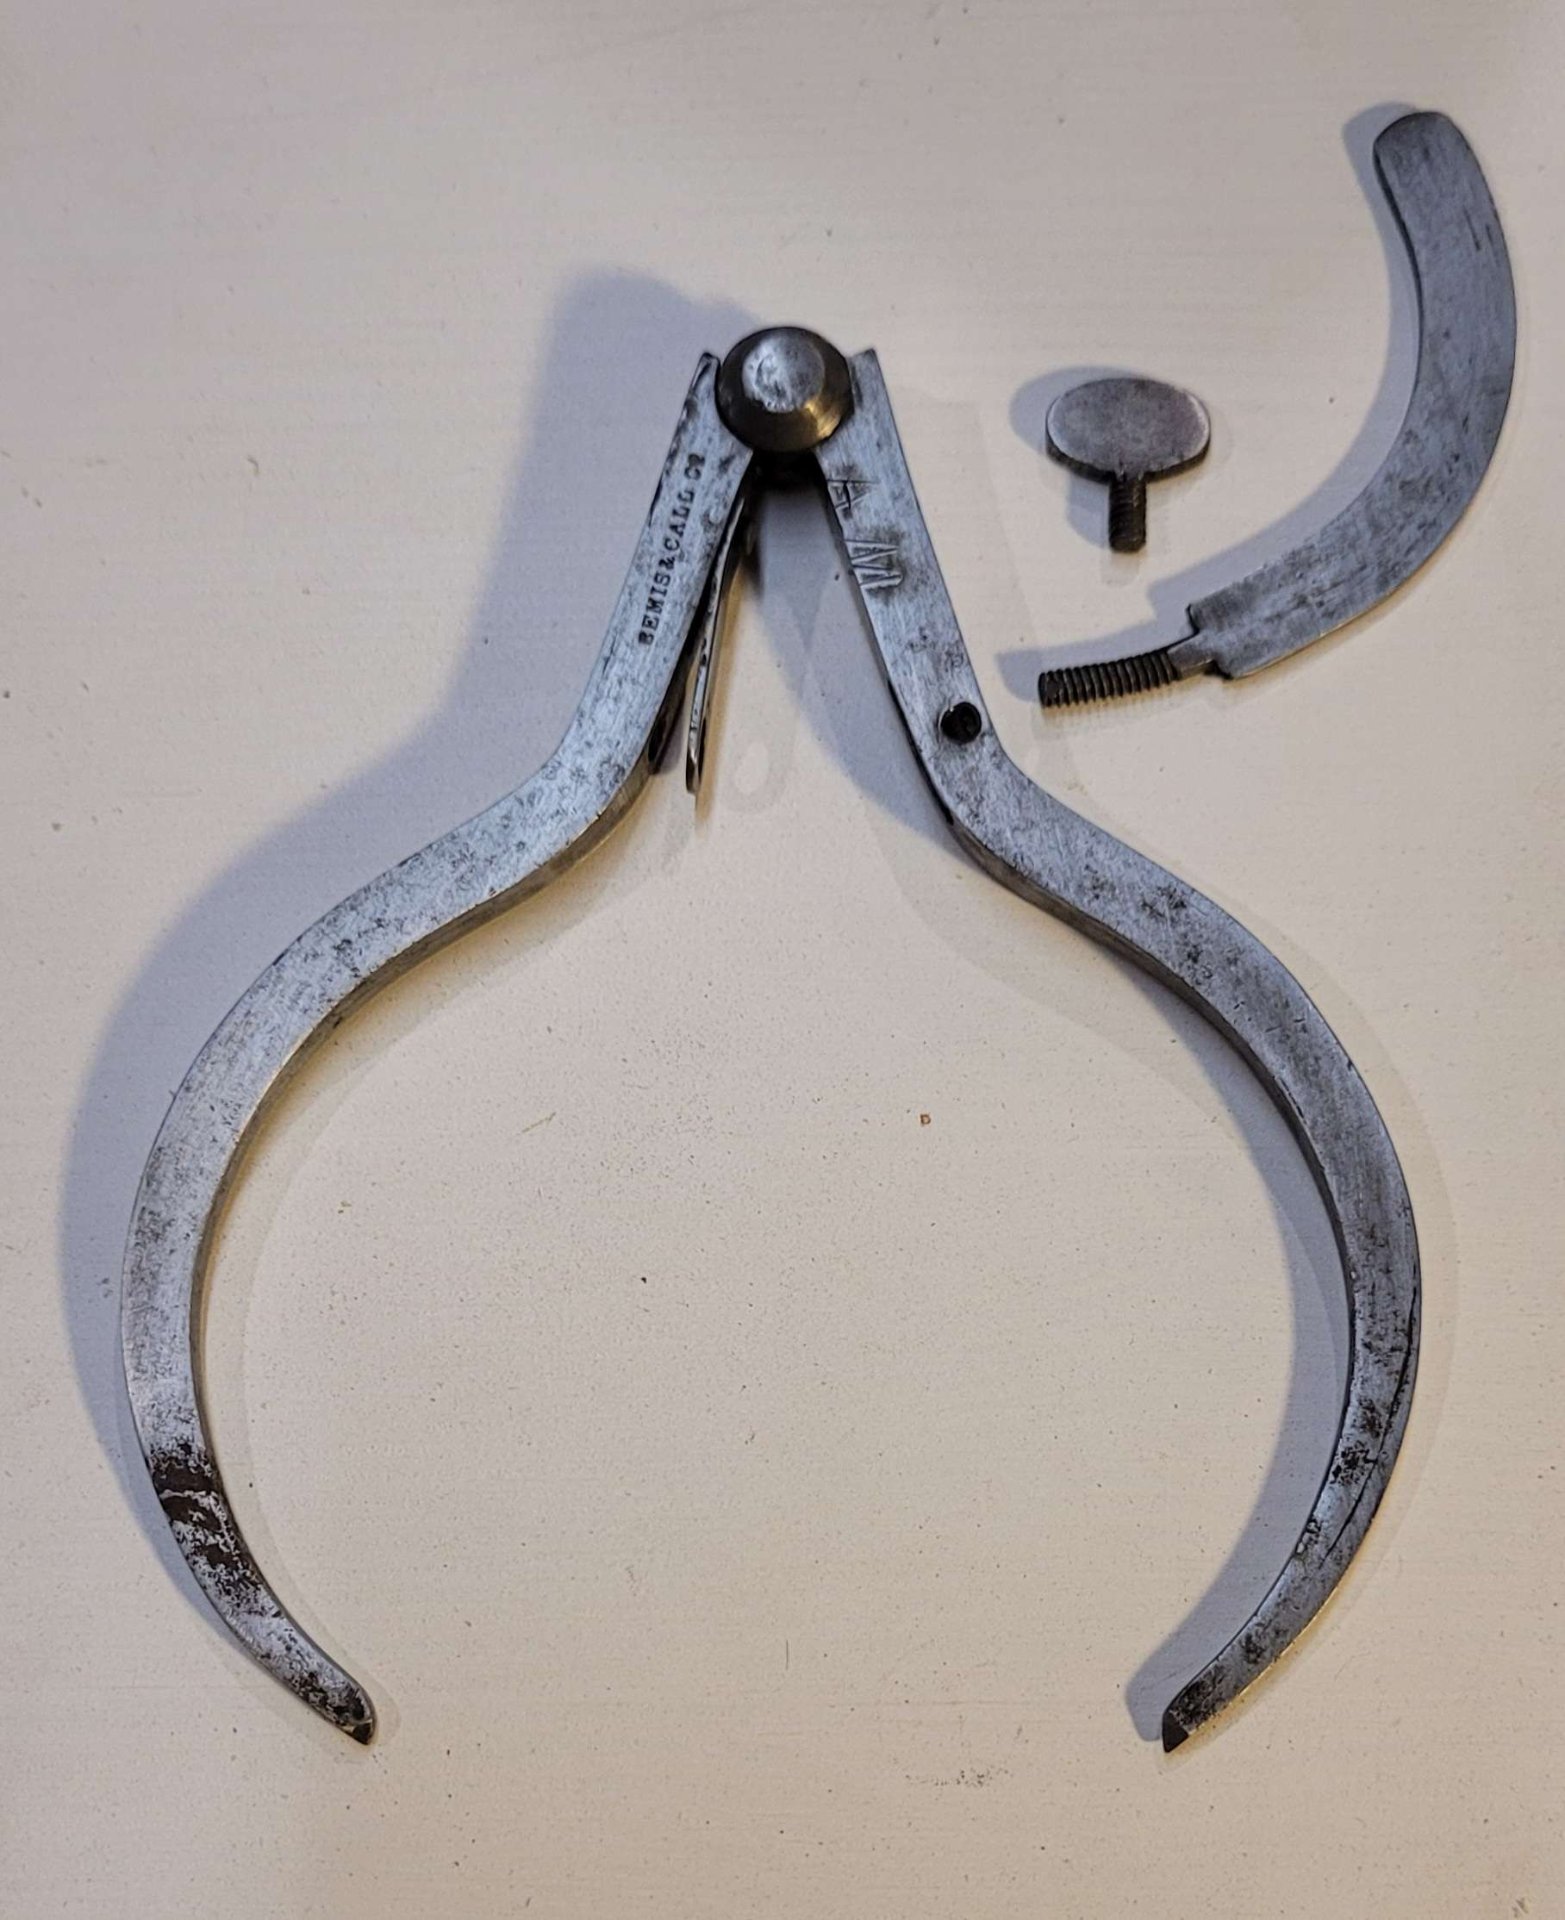
Looking better, but still a ways to go. I was surprised to find that there weren't any markings on the little distance arm. I'd been expecting to find little angle tickmarks or something, maybe even printed numbers, but there weren't any to be seen after the evaporust, or once I started gently sanding off the remaining rust and the black crud evaporust leaves behind.
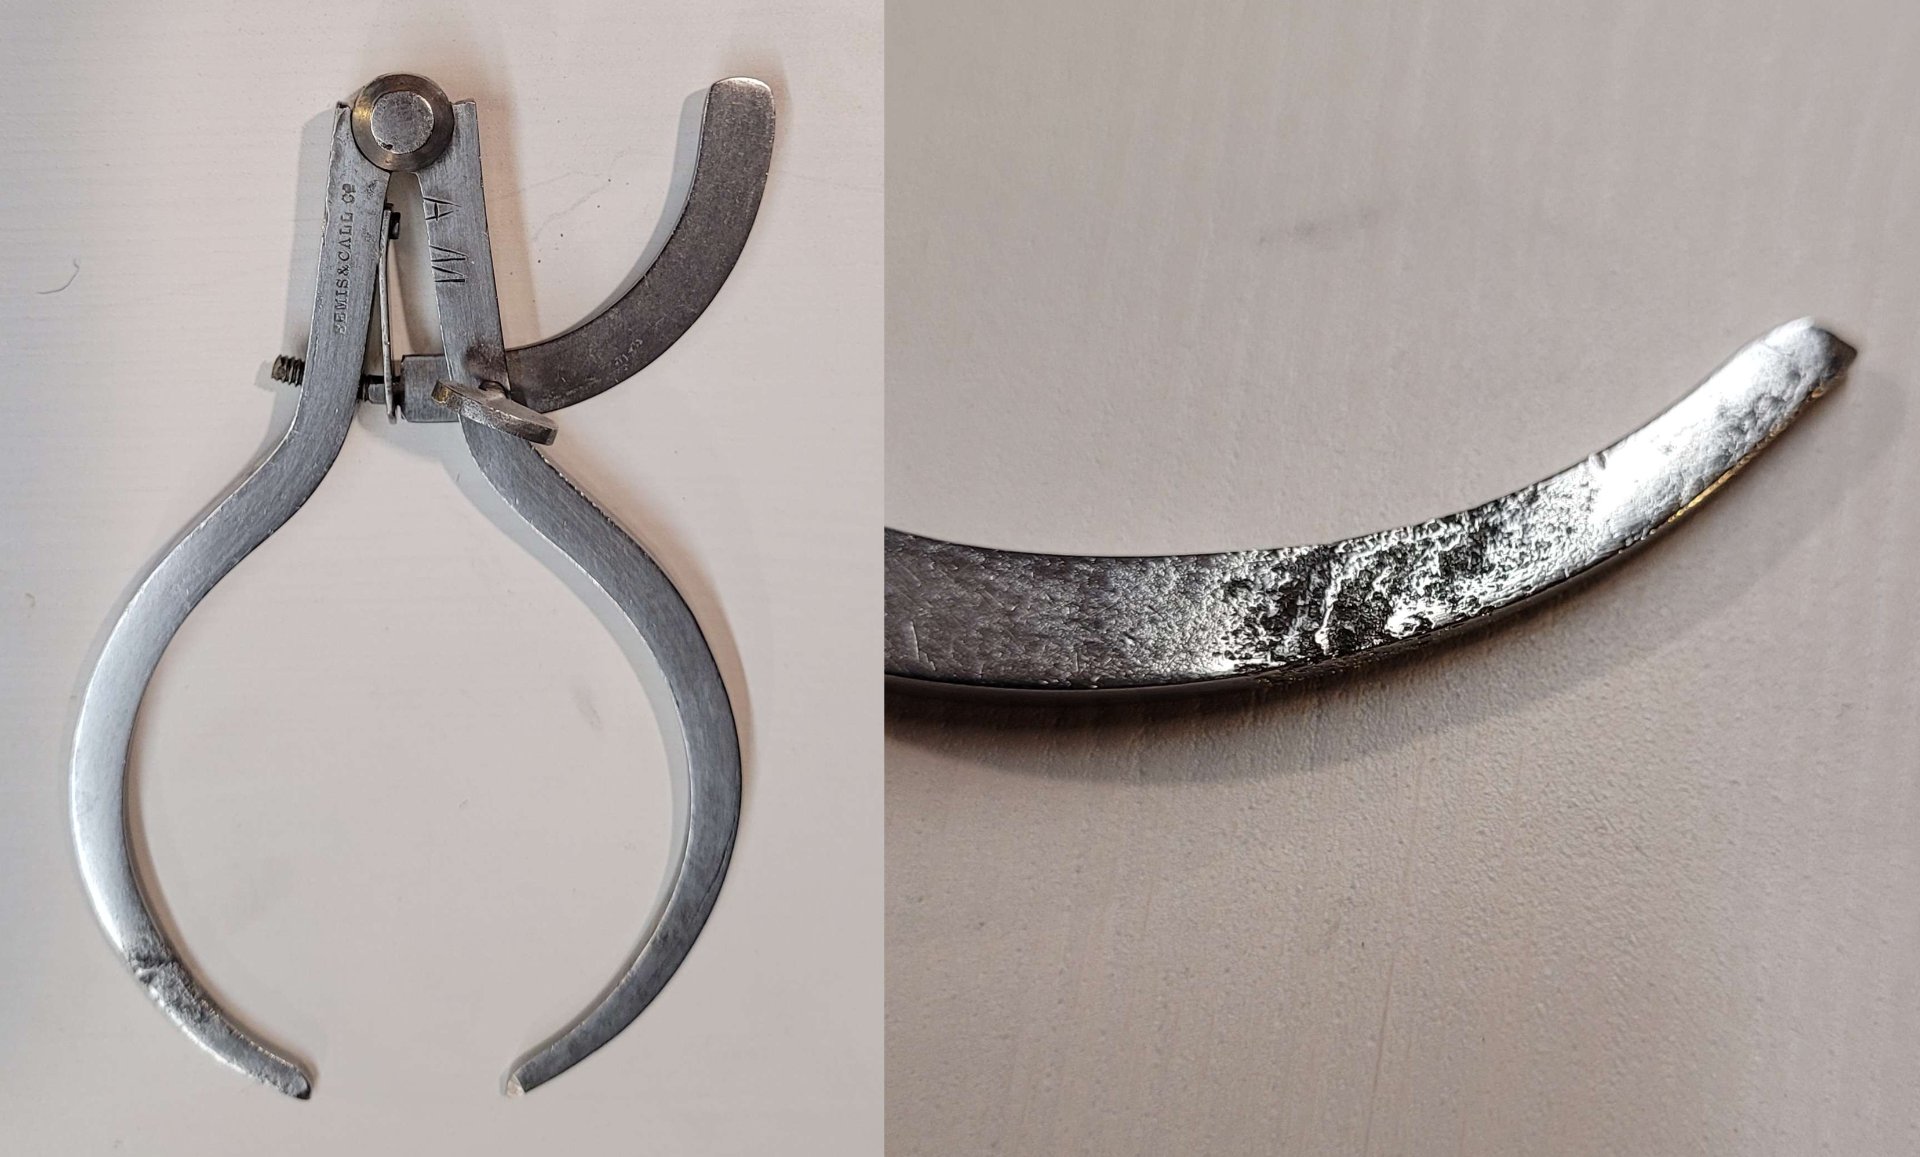
Once I had most of the rust gone, I switched to steel wool. I didn't want to take too much material off the surfaces, and I felt the more flexible steel wool would hit inside the pitting from the rust better.

The steel wool shined it up quite nicely. And here's a closeup of some of the surface pitting left over by the rust on the left side. The back of these calipers didn't have this kind of damage.

It was tempting to leave it here, but I didn't want the rust to return, so I decided to treat the calipers with cold blue, to provide some protection against oxidation. There are other ways to protect steel, but I like the look and it seems to hold up well enough.

Cold blue always looks a little rough when it first goes on (this stuff is a gel you don't want to get on your hands. You wipe it on, leave it to darken the metal for 60 seconds, and wipe it off again) but a little burnishing with 0000 steel wool will tidy it up:

There we go, still pretty shiny, but not as likely to rust again. Not bad considering how it looked in the beginning. Hope you'd approve, AM.

(I wrote this post for the making/fixing things blog I have on our local movim instance. If you're a slrpnk.net local, your credentials will work on movim automatically!)

23
submitted 1 month ago* (last edited 1 month ago) by JacobCoffinWrites@slrpnk.net to c/utilitycycling@slrpnk.net

I've been riding the same Gary Fisher Hoo Koo E Koo Mountain Bike since my uncle found it in a sandpit and gave it to me to ride while away on my first internship. It was in somewhat rough shape back then, and it's kind of the bicycle of Thesius at this point as parts failed and I found ways to replace them.

I was replacing the front tire and realized I'd like to make this thing into a cargo bike (I currently use it to scout for furniture to restore on trash days, but usually have to ride home and return on foot to grab anything I find, plus I could get groceries). I'm not sure what level of standardization this bike follows and I have no familiarity with cargo bike parts, but I was thinking I'd like to add a Rear Pannier Carrier Cargo Rack and perhaps a large basket on top of that - in fact, I happen to have this homemade welded steel basket I pulled out of a dumpster a couple years ago:

It's 23" long, 12" tall, and 16" wide. I could weld on whatever mounting hardware it needs.

So basically I'm looking for advice on layout and things to add, specific parts if you have any recommendations, is that basket a horrible idea, etc. What traits make for a useful cargo bike, what would work well with this old mountain bike? And thank you for any ideas!!

122

This is one I’ve had on my list for months now, and I finally decided to just go ahead and make it. Back when I was researching solar cookers, solar concentrator, and solar furnaces, I ran into a few really interesting ideas around fresnel lenses. Look them up on youtube and you can find all kinds videos of people melting glass or burning skillsaw blades in half, but the ones that kind of showed me how useful a really-concentrated point of heat could be was this 3D printer for sintering sand into glass objects and this solar rig for smelting zinc or aluminum. Both used fresnel lenses, but were limited by the size of their portable builds.

So here’s my take on something bigger and more permanent, though hopefully still flexible enough to do multiple jobs using concentrated sunlight. The building’s tower houses an observatory-style dome with an irising shutter around a very large fresnel lens. This lens is meant to gather light, but deliberately doesn’t focus it too much, just directs it to another lens, which aims the light straight down. There, on a motorized rig which allows for some adjustment up and down, is the third lens which actually brings it to a searing focal point.

With that focal point reliable and known, the people at the workshop could move several different tools underneath it as necessary, from a crucible for smelting, to a firepot for solar forging, perhaps a glassblowing oven, a 3D sinterer, or the large CNC plasma cutter-style rig shown in the scene.

A set of computers would be set up with light sensors and control over the rotation of the dome, to allow it to track the sun, and the width of the aperture in the shutters, to allow it to regulate the amount of light. The upper limit on the light would be based on how bright the day is, but if they need anything less than full sun, then the opening and closing of the shutters should help with providing consistency. If it starts around half open in full sun and a cloud moves in front of the dome, it might open all the way, then close partially as the cloud leaves. With many minute adjustments, the overall amount of light could remain very consistent down on the ground.

As for the level of focus, I suspect the kerf while cutting would almost definitely be wider than with a modern plasma cutter, but like I said before, people have cut through skillsaw blades with just a lens from a rear-projection TV. So it's possible a larger lens could concentrate even more heat, allowing it to burn through much faster, with less damage to the surrounding material. The tightness of the point would mostly come down to the quality of the lens, as far as I know.

I’ve tried to include a number of controls, caution markings, and red emergency stop buttons, but the one thing I really don’t like about the design as drawn is that it’s not obviously fail-safe. I think ideally there’d be some kind of hanging weight or other mechanism so that when power is lost (not just to the building, as that probably happens fairly often on a less-reliable grid, but to the system’s control unit) the shutters or another light-blocking mechanism slams into place.

Other notes about the scene, I’ve tried to include a diversity of ways to use the sun, the photovoltaic panels for powering the electronics and perhaps some of the tools, a set of fiberoptic solar daylighting systems, which track the sun and pipe light down to the shop floor, along with the simplest version, large windows. This emphasis on daylight should help avoid the risk of electric lights strobing in sync with moving items (such as on a lathe or milling machine) which can cause them to appear stationary and safe to grab onto, though they likely have two sources of light on each just in case. I’ve also included a water wheel, either for power generation, or for the direct motion, to be connected to certain tools or machinery via axles and belts.

31
Swan with Tire (slrpnk.net)
40

61

Houses require maintenance. How much and how often depends on the design and its surroundings. They also require occupants - in my brief experience at least, they degrade much faster when they’re left cold and empty than when someone lives there, even if that someone doesn’t fix things. Weather, encroaching water, mold, ice, and animals can all cause compounding damage surprisingly fast.

I think of the solarpunk society I've been depicting as being post-postapoclyptic. They’ve been through the worst of the climate crisis, wars, plagues, and all kinds of shortages, and they’re trying to rebuild better. In some of my previous postcards, I’ve tried to imagine what the rural communities I grew up in would look like transformed into a modern version of how they looked a hundred years ago, with denser villages, trains, and wide stretches of forests and farmland in between. They were set up this way back when because it was practical for people who walked or relied on horse carts to get around day-to-day, and who traveled to use a boat or a steam train for a longer trip. A solarpunk society that doesn’t want to rebuild the infrastructure(s) to produce and maintain personal vehicles, fuel them, and to drive them on, might have to look pretty similar out here.

But what happens to the houses and developments spattered across the land between those villages? Every road with a house a quarter mile from its nearest neighbor, now miles from those hubs of public transit? In a society where public transit is effective, and cars are rare, I think a lot of roads will degrade pretty quickly. They already need tons of maintenance, and that’s with people using them every day, totally dependent on them, grudgingly agreeing to pay for it. It’s not uncommon to live thirty minutes or an hour from your grocery store today, but on badly broken roads, that kind of travel is going to be more difficult and costly. Some people will do it, heck, some will have held out through all the bad times and will stay no matter what else changes. But I suspect a lot of houses will have been abandoned a long time ago.

There’s tons of embodied carbon stored in those structures. In their carefully-refined materials, their transportation, and in the act of construction. Some of those materials might be very difficult to produce for a society that carefully watches its externalities and seeks to do as little harm as possible. And the longer they’re left abandoned, the more they’ll degrade. The structures will become unsafe, the materials will rot or break, or become inaccessible, and in some cases, they’ll pose environmental risks as fuel tanks rust out, chemicals escape their storage, or damaged structures catch fire (even with the powerlines cut upstream, abandoned solar panels or poorly-isolated generators backfeeding into the grid might allow for damage to an abandoned house to cause a fire). This is especially true with modern buildings, particularly the kind of McMansion featured in the scene, with their heavy reliance on petro-products like “structural” foam columns and facades, which will go up like a struck match in the next wildfire.

In some cases, old buildings could be put back into use. Perhaps they’re nearby something the rebuilding society needs. Maybe one development will make for a good farming community, and another the barracks of a logging camp. Maybe one near a river can support trade or fishing. But there will be others that are simply not very useful. They were practical enough for semi-suburban life when gas was cheap, cars were plentiful, and roads were maintained. But in a world where most people have other priorities, live in closer communities, use public transportation, and aren’t interested in rebuilding a car-centric world, these houses don’t make sense. And of course there's the ones in unsafe locations (flood plain, unstable/eroding cliff, etc) where they won’t last no matter what. To that society, deconstruction might be a very practical answer to both the long term threat posed by these structures and to their own building material needs.

Deconstruction is an alternative to home demolition. It means carefully dismantling the constructed components of a house so the materials can be salvaged and reused. Materials are typically removed in the opposite order in which they were installed, to maximize reuse.

By carefully disassembling these structures and hauling the materials back to their communities, they can build and expand for a much lower overall cost (both environmentally and in resources harvested from the world) while removing potential toxin or fire threats. And by filling in their cellarholes and replanting, they can rewild developed land, build better habitats, and restore their local ecosystems.

On top of that, even buildings picked over by looters may be full of usable stuff - furniture, dishes, cooking tools, hardware - which a society with an interconnected library economy could use to meet its needs without producing new items.

So that’s what I’ve tried to depict here, a deconstruction crew carefully disassembling old world structures so that everything, from the windows to the metal roof panels, to the cabinets to the stick framing itself, can be reused elsewhere rather than produced new.

They’ve been working from left to right in this scene, taking each house apart in reverse order to how it was built. Much as with construction, this would require different crews of specialists: inspectors, roofers, carpenters, electricians, plumbers, and others who can safely remove resources without doing unnecessary damage. Once a crew finishes their part of a building, they’d hopefully be able to move on to another one nearby.

They’re also replanting/rewilding the old backfilled foundations, something that would certainly help with breaking up the concrete (eventually). Roots are great at that.

I’m not sure if it’d be worthwhile to use concrete saws to cut at least some of the concrete foundations into construction blocks. It’d certainly help with restoring the site quicker, and it’d be a low-ish carbon source for concrete blocks, but the tradeoffs in labor, transportation, and power for the saw might not be worth it. In that case, they’d probably crack it up with a jackhammer before filling it back in.

There’s a lot of vehicles in this scene, so I should emphasize that these aren’t daily drivers. These are equipment used to haul work crews and construction materials on fairly short trips.

All the big trucks in the scene are old internal combustion engine vehicles converted to run on woodgas. I imagine they burn a lot of the wooden construction debris which were otherwise too small or damaged to be worth salvaging. Perhaps some trucks are even set up with plastic de-refineries and are able to use astroturf lawns, broken plastic siding, or “structural” foam facades as fuel on their trips. This isn’t perfect: it still produces pollution and releases CO2, but if the goal is to salvage as much material as possible, and to prevent it from burning pointlessly in the next wildfire, I could still see an aspirational society accepting that use of it.

As a bonus, woodgas vehicles are often used as generators, so they may be able to serve that role part-time on-site, powering lights and air pumps for confined spaces like basements, and even certain tools. Otherwise they’d probably use portable solar panels.

The other (smaller) vehicles are electric minitrucks and rickshaws.

I imagine that the workers are a mix of specialized crews brought in by the larger community for the scheduled deconstruction, and local volunteers who are working for trade in recovered materials. I imagine a lot of the cargo bikes, Chinese wheelbarrows, rickshaws, and minitrucks belong to them. I figure in place of real roads, the really small villages and isolated homesteads maintain a surprisingly dense web of rough trails suitable for mountain bikes or snowmobiles, which connect to all their neighbors.

Last art thoughts: I have another scene of a golf course and its surrounding McMansions turned into a solarpunk intentional community that I’d like to do, but the scope on that one is big enough it’ll be awhile before I can get to it. At this point, I’m confident I’ll make it though. McMansions, with their pointless, wasteful scale, their cheap construction, their reliance on petro-product materials, and their often vain attempt to spend their way to classiness, seem kind of like the antithesis of solarpunk design to me. Golf courses with their endless, expensive-to-maintain grass monocrop hold a similar, though less severe place in my mind.

If you read all that, thank you! And if you’re a person who owns a building in real life, and you’re thinking about doing some renovations, please consider reaching out to your local chapter of Habitat for Humanity or another group who will do deconstruction, rather than just smashing everything up and throwing it away.

[-] JacobCoffinWrites@slrpnk.net 18 points 2 months ago

Tools! With the exception of a few big power tools like a table saw or miter saw, where the new safety features make it worthwhile, I get everything I can used. I prefer stuff passed down from family with sentimental value, but I get a lot of my tools from Everything is Free, junk stores, yard sales, estate clean outs, swap shops etc.

Older tools tend to be simpler, easier to fix, and remarkably sturdy. I've read that the metallurgy wasn't as good sixty+ years ago so they overbuilt them a bit to compensate, and then decades of use weaned out the weaker ones, so anything left still working is basically survivorship-bias guaranteed. I've got a drill press that's been in the family for four generations and will probably outlast my grandkids.

They're cheaper, sturdier, easier to fix, generally well-documented online (sometimes better than the new stuff), and they don't come with sheaves of unnecessary styrofoam and plastic packaging. And they have history and stories in them, even if I don't always know what those stories are.

33

My SO and I have been planning to start a mushroom garden for awhile now. You can buy these kits with mushroom spawn in peg form, and you just drill holes in a log and hammer them in. I'd had big dreams of going along the bike path, adding them to all the dead logs there, until I learned how important it is to properly and thoroughly inoculate freshly-cut logs in order to make sure your fungus of choice is properly established and safe from the competition. This was a bit of a problem as we live in an apartment and the circumstances where I'd cut down a healthy tree are seriously slim, and don't include providing food for mushrooms.

But one of the perks of having a big family is that one of them is always doing yard work, and when one of their birch trees bought it in a recent snowstorm, I was ready to jump in and claim a few pieces. They were happy to get rid of it; they feel grey birch burns poorly - and I was happy to take some because it supposedly turns beautifully on the lathe and it's a suitable medium for shiitake mushrooms.

As an aside, I prepped one thinner piece for use on the lathe. I clamped it to the table and used a draw knife (and a regular carving knife) to strip off the bark, before painting the ends with wax. This helps prevent cracking and checking due to uneven drying from the ends, and spalting/mold/rot from moisture under the bark. Assuming it does as well as the maple and oak I've done previously, it'll be ready to use in a year or two.

Okay, back on to the mushrooms! We bought our kit from a company called Northspore who provided pretty thorough guidance. Their instructions said that logs 4-6" thick and 3-4' long would be good, and one of ours fit that nicely. The instructions also said our log had been cut at about the worst time, after the buds on the branches had begun to swell. So... sorry, mushrooms! Hopefully you'll figure out how to make that work.

They provided a drill bit, instructions on how deep to drill (1") and where (in staggered rows, each hole 4" apart, 2" from their neighboring rows, so it makes diamond patterns). I grabbed a drill and measuring tape and set about drilling all the holes.

(I also cut a couple risers out of a dead log to keep the mushroom log off the ground)

Once all the holes were drilled, we started hammering in the pegs with a rubber mallet.

I don't have great photos of this step (it was a lot of fun) but here's one of the log after we got them all driven in.

The last step was to seal all the pegs in place with melted wax. The kit provided powdered wax and a little fuzzball on a wire handle for applying it. We set up a double boiler on a hotplate and melted the wax while we added the pegs.

We hid our mushroom log in a shady forested spot near the apartment fence. If all goes well, I'll be back with mushroom pictures sometime next year.

21

The last webcomic I recommended was Black and Blue. This one has a lighter tone, and has got some superhero influences, though I think it still falls under cyberpunk.

I've caught up to 2022 and have enjoyed it so far. Apologies if it's better known than I realized, I just stumbled onto it a day ago.

[-] JacobCoffinWrites@slrpnk.net 22 points 3 months ago

I guess I'm glad they did it this way. The ants got it way worse

[-] JacobCoffinWrites@slrpnk.net 16 points 3 months ago* (last edited 3 months ago)

This is something I've been interested in too. Here's some more resources I've gathered up:

Technology from the late 1800s, early 1900s combined in new solarpunk ways:

I think there's a lot of value in using energy in the form we receive it to minimize conversion losses, and in recent discussions I've been introduced to a couple new ones: solar steam generators which use trough reflectors or ranks of mirrors focused on long vacuum-lined tubes of water to produce steam which can run steam engines/generators. With clever application of steam storage tanks, they can even store excess pressure to keep it going when it’s dark, and to cycle fluid in the system using excess pressure rather than using pumps. This thread had some really cool info on how these went together and the ages of the various components: https://www.reddit.com/r/solarpunk/comments/1b8048e/comment/ktmjpst/?utm_source=share&utm_medium=web2x&context=3

(It also doesn’t have to be used to turn a turbine or generate power/motion. There’s tons of systems in industry that need steam for sterilization etc: https://solarimpulse.com/solutions-explorer/fresnel-solar-steam-generator-1)

Soda locomotives: fireless steam locomotives where the boiler is surrounded by a tank of caustic soda, which generates heat when water is added, and the steam exhaust is condensed and added to the soda to create more heat. It goes until the soda gets too dilute, but it can be 'recharged' by drying it out. These never really took off because it took more coal to dry the soda than to run a similar train, and electric trains quickly came into their own and filled the niche of low-pollution trains for inside cities and tunnels. But I feel like they could pair well with solar furnaces or cookers stationed along the tracks. The locomotive would just exchange wet soda for dry and start again. This has an advantage in being completely analog and able to work on cloudy days or at night, as long as you get enough sunny days to dry out big batches of soda at the stops along the way. And the drying stations are stationary so they can be optimized for their location.

There are also fireless locomotives which are basically just a big steam tank, rather than a boiler, which are filled by an external source of steam where it’s plentiful, like onsite at nuclear reactors, and perhaps certain geothermal ones. That might fit some other use cases.

Waterwheels - preferring the kind that didn't dam up the entire river but instead guided a part of it into a separate channel, where the waterwheel would be mounted. The remaining river would be undisturbed, which is better for the habitat, while still generating free motive power.

vapor-compression systems these were used in old-fashioned refrigerators but modern technology could optimize the design, and they could be matched with any steady motion from a water wheel etc.

I feel like streetcars are always worth mentioning, just because they were such an effective transport system for cities, even using quite early motors, metallurgy, electrical knowhow, and hitting their stride way before modern batteries that could power the vehicle they're riding in.

I should also mention solar furnaces, and solar ovens which can produce useful heat with fairly simple components (mirrors and a bit of math) which should be useful in any recovering society

1940s tech:

Woodgas conversions of internal combustion engines I like these because it emphasizes reuse of existing machinery instead of new manufacturing. It doesn’t require high-tech electronics or rare materials for batteries like electric vehicles. And it’s less practical for the kind of quick trip to the store or daily commute which has shaped our current society. A woodgas vehicle takes awhile (ten to twenty minutes to start up), can’t easily be stored indoors, and because the fire needs to burn down, doesn’t make much sense for short trips. But in a solarpunk society, most folks shouldn’t need a car for that stuff – they’d be walking or taking public transit. So conversions like this would be used for special trips – hauling produce to town, supplies out to forest management camps, research sites, and other remote locations. And perhaps for road trips by campers and other people who might borrow one for an adventure. The wood can be sustainably sourced, using scraps from sawmills, harvested invasive trees, brush, and even dedicated coppiced plantations of especially fast growing trees like paulownia elongata. One of the byproducts of gassification is biochar, which can be tremendously useful in compost, and holds carbon for a comparatively long time. I also think its important to note that while this can be done well, when these vehicles were previously used in massive numbers (during WWII) they led to deforestation. They make sense in small doses, and with some careful management of their inputs.

I got a bunch of good info from this person on reddit

Edit: bonus airship rant:

Despite seeing relatively little use, airship design has advanced tremendously in the last hundred years. Improved materials have allowed them to take more effective shapes, and improved engines, motors, batteries, and computer systems, have made them much easier to control. While reading about historical airships, I was struck by the risk in doing almost anything with them, but especially by landing – which often required ground crews (‘landing parties’) of hundreds of men who would by strength of muscle, pull the thing down to the ground. By contrast, modern airships can land themselves right on the ground.

Airships could open up some really cool possibilities: while they lack the speed of a jet, they have more capacity, and lower fuel requirements. While they lack the sheer capacity of a container ship, they’re a lot faster and use way less fuel. They can also fly over land, meaning they can reach all kinds of places ships can’t, and cut long detours around continents or transfers between vehicles. Basically, container ships might be able to carry more, but they’re not as good at going from Boston to Seattle, and they suck at getting to Kansas City. What’s more, airships can act as flying cranes, lifting bulky objects like wind turbines or assembled buildings right over obstacles, and to places where roads or trains simply couldn’t carry them.

[-] JacobCoffinWrites@slrpnk.net 25 points 5 months ago

Is disagreeing with the point really off topic? perestroika's comment looks well thought out it just doesn't agree. And frankly I'm ... skeptical of the argument that we can't stop a genocide because we'll be just as bad as the perpetrators.

[-] JacobCoffinWrites@slrpnk.net 16 points 5 months ago

He was smart enough to get born back when houses and land were cheap after all. You can't put a price on that kind of foresight

[-] JacobCoffinWrites@slrpnk.net 31 points 6 months ago

Recently I was listening to the podcast Knowledge Fight and heard musk speak for the first time on a twitter conference call thing with Alex Jones. I never knew how bad he is at public speaking

[-] JacobCoffinWrites@slrpnk.net 36 points 7 months ago* (last edited 7 months ago)

I use that thing a lot, but they usually drive close enough to get the side mirrors too, and generally light up the whole cab. So I spend however long they're behind me hunched forward to keep their brights out of my eyes, waiting for a passing zone. I'm not even a slow driver.

[-] JacobCoffinWrites@slrpnk.net 38 points 7 months ago

The temptation to mirror tint my rear windshield goes up every time I drive at night

[-] JacobCoffinWrites@slrpnk.net 15 points 7 months ago

What a cool design!

[-] JacobCoffinWrites@slrpnk.net 31 points 7 months ago

Congrats! Sounds like a tricky fix and I'm glad you could get it to work!

view more: next ›

JacobCoffinWrites

joined 1 year ago
MODERATOR OF